Showing posts with label autumn. Show all posts

Thursday, October 31, 2013

Sweet Potato and Zucchini Frittata

I’m counting down the days until I leave for Malta. It’s strange, almost like a dream, to be planning for a year abroad. The semester is half over, and there is so much to consider: medication, budgeting, schoolwork along with a 40-hour workweek. It’s all so surreal, but it’s typical of me. I never do things at half-mast. If I’m going to experience change, it’s going to be a ton of changes all at once, like a Band-Aid being pulled off quickly to avoid the prolonged suffering.


Thirty-eight days. I have just over a month and a week until I fly to Europe. Thirty-eight days to see as many people as I can, to make as many memories as I can, and to get as much schoolwork and paperwork done as possible before I board that plane. What books do I bring? What clothes do I pack? Would I be able to pack the large teddy bear that CK (the boyfriend, that is) gave me for Christmas last year? Could I pack my hobbies and paint, sew, rock climb, and photograph while I was away? What about the Insanity workout and yoga? What about gardening?

Volunteering as a Photographer for MD's Halloween Bloc Party

It’s all so daunting in an exciting, holy crap sort of way. I’ve never been to a place that didn’t have leaves change or snow fall during months that usually do in my neck of the woods before. Actually, I’ve never been to the Mediterranean before either, but I’ve heard wonderful things from CK (you can get to know him here). For one thing, the cheese and the wine are famous for reasons taste buds can accredit; for another, local food sources year-round would be in abundance. These things excite me almost as much as the internship and being in the same time zone as CK do. There’s an entire culture I get to be part of, with recipes to make to further understand the country I’ll be living in.

But what about the autumn weather I so enjoy here on the east coast? What about the fall flavors of root vegetables and warm spices to fill you up and ground you: will it be the same over in Malta? Will baked apples, squash, and other slow-cooked foods provide the same satisfaction in Mediterranean weather as it does around this time of year back home?

I have no idea, but I’m excited to find out. Until then, I have a series of recipes that are perfect for the autumn season: warm, filling, nutritious, and (as always) gluten-free.

Sweet Potato and Zucchini Frittata

1 tbsp. Ghee*
1 tbsp. Olive oil
600 g / 3 small Sweet potatoes, shredded
1 Green zucchini, shredded
1 Yellow onion, halved and sliced into thin crescents
4 Garlic cloves
100 g Fresh kale, coarsely chopped
9 Large eggs, blended
Sea Salt, to taste
Herbs, to taste**
3 Small tomatoes, sliced thinly

Preheat the oven to 350°F.
In a large, deep skillet (or stainless steel wok) on medium heat, pour the oils and spread along the bottom of the pan.
At smoking point, add the onions and sauté for a minute or so, and then the sweet potato, zucchini, and garlic.
Cover and let soften for five to ten minutes, stirring periodically to make sure it cooks thoroughly but doesn’t burn.
Once softened, turn off the heat and toss in the salt and herbs, followed by the eggs (you may need to turn the mixture in the pan to ensure even coating).
Place the tomatoes on top in a design of your choosing.
Cover the pan with foil and baked in the oven for 30 minutes.
Take the foil of the top and allow the frittata to bake for another 20 - 30 minutes or until done.
Remove from the oven and let it sit for a couple minutes.
Slice into wedges and serve hot.

Makes 4 Servings.

*If you don't have ghee, you can substitute with regular butter. If you want this to be completely dairy free, you can just use 2 tbsp. olive oil instead.
**You could do just about anything with this dish regarding herbs. I mean, I considered allspice and cinnamon. But I ended up with a couple dashes each of tarragon, basil, and Parisian Bonnes Herbes.

Sunday, October 20, 2013

All Work and No Play

The Burt-man recently asked me if I have enough fun. It’s the sort of question that hits you in the face like cold water in the mornings. It wakes you up. It makes you think.


I go to school full time. In grad school terms, that’s nine credits or higher. That’s nine hours in the classroom, six of them being in the late evening. I then devote three days to studying, one for each class, and studying (as well as paper writing and presentation making) can take up to fifteen hours in total. I also work part-time; nothing fancy, just twelve hours three days a week. It takes my mind off school and it’s one of the best jobs I’ve ever had, but it’s still a job. It still takes a lot of energy to be present for the kids as well as my co-workers.

If we add it all together, plus the time it takes to commute, school and work equal to a full-time job. (Mad respect for grad school students who are parents and/or with full-time careers. You guys are the kings and queens of time management.)

Due to the change in my schedule this semester, this meant I had to stop rock climbing for a while. (I just about cried when I told SportRock I needed to freeze my account.) I couldn’t make the time to go in the evenings, because by that point I was exhausted and all I wanted to do was read another novel from Terry Pratchett’s Discworld series. My mornings have been devoted to sleeping eight hours, and simply just chilling out or working on projects. I barely had the energy to do Insanity, let alone to go out and see people and go on adventures. I’ve never been so appreciative of my bed before this semester, or sleeping in general.
I'm so jealous that my cats can literally sleep whenever they want.

It’s the final stretch towards obtaining my Masters Degree, and it has me hyperfocusing so narrowly that I literally have to schedule fun and force myself out the door to have it. Don’t get me wrong; I love my classes and my job. I enjoy the readings, the discussions, and being in the classroom. I cherish the time I have with the kids and my friends at work. But the Burt-man’s question irked me, because it’s true. I’ve forgotten how to have spontaneous fun without the fear of procrastination and motivation looming over my head.

Fun became an expense. I couldn't afford it anymore.


I also have been preparing for my internship in 2014. Yes, I got an internship. In Malta. For a year. I have never been so excited and so terrified for anything before. I will be leaving in early December to settle into this new chapter of my life. So along with the typical week I mentioned, I also have a year of being abroad to consider: what to pack, what paperwork is needed, where I’ll be living, how I will need to budget, etc. I considered doing distance-learning classes along with the internship and my school’s requirements for internship credit in the spring, but decided against it. Why? Because I’m going to be in Malta, that’s why! Because my internship is a forty-hour workweek, and because I want to do my best and still have fun while I’m there.

So with papers and projects coming up (or in one class’s case, a midterm due tomorrow), I am getting myself in the writing groove by writing this post and talking about emotional health.  Guys, everyone needs fun for themselves, even when your schoolwork and your job are things you look forward to every day. You need time (or a day) to yourself to do things for you. That’s why I’m getting myself out of this motivation rut and will set aside time to myself every day to make fun and be creative. If you focus on all the things that have to get done, nothing ever will. Recipes won't happen. Grades will start slipping. Depression and illness will settle in. Work will seem like a chore. 

So I'm having fun this fall. I'm making time and I'm making meals again.

Autumn is my favorite season. I love the crisp in the air, the color changing in the leaves, and the seasonal crops on the shelves and in the farmers markets. Virginia is bursting with apples, squash, and dark leafy greens, and I wanted to honor that with a dish. It’s a casserole that will keep you warm on those rainy days and chilly evenings. I call it the Three Sisters Casserole because it has corn, squash, and legumes in it, but you can most certainly taste the autumn in every bite.

Three Sisters Casserole

Pumpkin Cornbread batter*
227 g Cooked black beans
1 Medium Zucchini, thinly sliced
200 g Kale, coarsely chopped
3 (240 g) Chicken Thighs, cooked and coarsely chopped**
1 Yellow onion, halved and cut into thin crescents
3 Garlic cloves, coarsely chopped
1/2 tsp. Sea salt
Dash of Sage
50 g Parmesan cheese

Preheat the oven to 425°F.
In a medium sized bowl, combined the dry ingredients and then the wet ingredients of the pumpkin cornbread batter and set aside.
In a large pot (or stainless steel wok) on medium heat, pour a tablespoon of your cooking oil of choice.
Upon smoking temperature, sauté the onion, garlic, zucchini, and kale and cook until soft.
Add the beans and chicken and continue cooking on medium-low heat for five minutes and add the sea salt and the sage.
Turn off the heat and sprinkle the Parmesan cheese on top.
Pour the batter over top and bake for 25 – 30 minutes, or until the crust is golden brown and it is cooked all the way through.

Serves 4 – 6.
*Pumpkin Cornbread
90 g Sorghum flour
1 tsp. Baking soda
1 tsp. Unrefined Apple Cider Vinegar
21 g Honey
3/4 tsp. Sea salt
150 g Masa flour
2 Large eggs
15 g Ghee (or melted butter)
250 ml Whole Milk
250 ml Water
200 g Pumpkin puree

Prepare as you would your typical cornbread recipe, which can be found here.

**Vegetarian, you say? No problem! Simply replace the chicken with another 240 g of cooked beans. You can also substitute it with mushrooms, butternut squash, more cheese, or additional veggies.

Thursday, November 15, 2012

Self-Evolution with Primal Eating

In the two weeks I’ve experimented with Primal eating, my body shifted. It was a slow shift, mind you, but a shift it was. And with two more weeks to go, I wanted to share my experience.

It’s not as difficult as you think it is. The people who know of my eating habits (gluten, soy, and cane sugar free) were concerned with the additional “restrictions” I was putting upon my diet, particularly with my past disordered eating in the forms of orthorexia and anorexia.
“But you need legumes, Morri!” one lamented.

“What can you eat then?” asked many in exasperation.

 “A lot more than you think I can,” I replied.


For one thing, there is a difference between “Paleo” and “Primal” eating, though both lifestyles stem on similar evolutionary science. Mainly the difference lies with saturated fats, and how primal eating is all about enjoying grass-fed humanely raised meats and products (butter, eggs, full-fat milk and yogurt). Grains and sugars are limited (if not removed completely) as the consumption of vegetables and protein increases. Fruit is eaten in moderation, and dairy is promoted by some while discouraged by others. There’s also a fundamental difference in the two dietary lifestyles with the role of diet sodas and artificial sweeteners. But I agree with Mark (from Mark’s Daily Apple) when he says: “If you aren’t getting anything positive from the meal or drink, you shouldn’t be taking the risk of the artificial sweetener.” Finally, what drew me to going Primal instead of Paleo was treating it “as a broad, holistic approach to living and not simply a list for eating.” 

The list for eating is quite delicious, however... 

There will be some among both the Primal and Paleo community that do not eat what I eat and vice versa. For instance, I loved the food list on Mark’s site as well as the following food pyramid and decided to create a hybrid. I do use honey on occasion, and I eat quinoa, wild rice, and tuber vegetables throughout the week. I’m fairly successful at eating protein and vegetables at every meal, though I have noticed cravings for more servings of fruit. I don’t miss rice, nor any other gluten free grain. For the most part I’ve been dairy free also with the exception of some cheese or kefir, but after receiving raw milk (among other dairy delights), my body was so happy to have the nutrition.

(source)

Being Primal also means a different food/fitness culture for everyone. As my ancestry is almost exclusively from the British Isles, my body will respond better or worse to certain foods and exercise regimens than someone from the Amazon or Pakistan. Perhaps someone from China can eat more grains with some protein and vegetables and excels at martial arts while I can eat more protein and vegetables with some grains and excel at leg-oriented sports or climbing. Maybe fish calls to you over chicken, or fermented vegetables over stewed or roasted. Maybe you can eat fruit at every meal or none at all to feel your best. Maybe nuts and non-animal derived fats/oils keep hunger at bay when it makes someone else famished thirty minutes later. It’s all about what works for you, experimenting by adding and/or diminishing foods as you go. 

In the first week of going Primal, I was literally hungry all the time. As I, like many, used fiber in the sense to be *ahem* regular, there were days it felt like my IBS had reared its not too pretty head in the form of constipation, lethargy, tenderness, and irritability. By the second week, the hunger subsided and the symptoms lessoned. And now, entering to week three, regularity is still to be desired and I’m practically never hungry. I’m tired all morning, but I think that’s something else entirely.

Primal eating and food substitutions aren’t as daunting as I thought they’d be. Instead of spaghetti with meat sauce, try cooked spaghetti squash or sautéed julienned zucchini and carrots with meat sauce. Instead of fajitas, try making fajita bowls with your favorite meat and vegetable combinations. Substitute rice for quinoa or wild rice, or white potato for sweet potato or a winter squash. Eat humongous salads with whatever Primal foods you happen to have on hand in your pantry or fridge. If you are hankering for bread or something of that nature, there’s plenty of almond/coconut pancake, quick bread, dessert recipes out there for you to try. It’s all about substitutions, people, and you’ll feel like Primal gods once you get the hang of it.

We all know how much I love chili, right? There’s something about that delicious, meaty stewp (I still don’t know if chili is a soup, a stew, or a combination of the two) that I can’t get enough of. Highly adaptable with the potential of never being made the same twice, I wondered what happened if I went the Texan way. You know, without beans. Legumes are a no-no on the Primal eating list, so I thought of possible substitutions for it that would make sense. Potatoes? Nah. More meat? Nah. Vegetables? Sure, but which one?

The beauty of going Primal in November was the inspiration to use winter squash with my turkey chili. And let’s just say, it’s now a dinner table favorite.

Autumn Pumpkin Turkey Chili

1.25 lb Ground Turkey
560 g Butternut squash, cubed
410 g Diced tomatoes (from 1 can, or by hand)
425 g (1 can) Pumpkin puree
1 Red onion, coarsely chopped
1 Green bell pepper, coarsely chopped
200 g Kale, finely chopped (fresh or frozen)
3 Garlic cloves, finely chopped
1 tbsp. Chili powder
1 tsp. Sea salt
1 tsp. Ground ginger
1/4 tsp. Powdered sage
1/4 tsp. Cinnamon
1/8 tsp. Paprika (Spanish smoked)
1/8 tsp. Chipotle

Place a large pot or pressure cooker on medium to medium-high heat, grease the bottom with your preferred cooking oil (coconut oil or ghee is mine).
Once it has reached its smoking point, drop in the ground meat and, with a wooden spoon, stir and break apart the meat until completely cooked and separated.
Add the spices to the meat until thoroughly mixed, and then add the remaining ingredients.
Cover the pot and let sit over medium heat for at least an hour.*
Garnish each bowl with your choice of sour cream, cheese, diced onion, avocado, or all of the above.

Makes 6 – 8 servings.

*I like using the pressure cooker, as it cuts the time for chili in half. If you are cooking with a regular pot (or even a slow cooker), it will take longer for the smoky flavor to sink it. It will be good regardless.

Tuesday, October 16, 2012

Spiced Pumpkin Cornbread & Salted Raw Pepita Butter

I am one of the many people in the world that looks forward to fall for a number of reasons: the rainstorms that smell like snow; piping hot meals in the forms of porridges, stews, roasted meats and veggies, and cobblers; sipping on hot chocolate, chai tea, and apple cider; leggings, scarves, warm hats and mittens; the leaves changing; and finally, all things pumpkin.


While I have thoroughly enjoyed and embraced other foods synonymous with fall (apples, carrots, and kale in particular), pumpkin is one of those things I literally count down the days until cans of it are displayed on the shelves. I love everything about this winter squash: the flesh, the seeds, the growing, and the artwork. It is so versatile and so easy to incorporate in practically any recipe you can think of. What’s not to like?

Last year, you could say I went a little fanatic with putting pumpkin in everything I ate. And it looks like this year will follow the same route of pumpkin-ness (I mean, you’ve seen my header, right?), with the promise of non-pumpkin fall treats to balance it out.

This week I was hankering for some pumpkin pancakes, and thought of using special arepa flour (also called masa flour on this blog, i.e., corn flour treated with lime) as the base. Well, for those who use this flour regularly, you will know how dry your dough/batter can be, and thus add more liquid to make it manageable. As the result, my first pancake was impossible to flip and broke apart, and my desire for pumpkin corncakes went out the window. So I did what I thought was the most logical thing to do: I baked it in a loaf pan.

Pancakes? Sadly, no. But delicious warm quick bread? Yes, sir!

Spiced Pumpkin Cornbread

240 g Masa flour
360 g Unsweetened almond milk (whatever “milk” you have on hand will work too)  
200 g Pumpkin puree
5 g (1 tsp.) Whey
2 Large eggs
60 g Applesauce
1 tsp. Bourbon vanilla extract
1 tsp. Sea salt
1 tsp. Cinnamon
1 tsp. Ground ginger (freshly grated is okay)
1/2 tsp. Allspice
1/4 tsp. Nutmeg
1 tsp. Baking soda
5 g (1 tsp.) Unrefined apple cider vinegar
60 g Melted butter
120 g Thompson raisins, optional

Combine all of the ingredients as listed (except the baking soda, cider vinegar, butter, and raisins) in a medium-sized bowl and place in the fridge to sit covered over night.
Remove the chilled batter from the fridge and get it to room temperature before adding the remaining ingredients.
Preheat the oven to 350ºF.
In a greased single loaf pan, pour the batter and spread it evenly.
Bake for 1 hour and 15 minutes or longer, depending on the oven.
Remove from the oven and leave it to cool for half an hour before removing the loaf from the pan.
Slice to desired thickness and serve warm.

Makes 4 – 8 servings.

Naturally you need something pumpkin to put onto pumpkin bread, right? I made a batch raw pepita butter (salted) that definitely suited that need.

Salted Raw Pepita Butter

300 g Raw pepitas
1/2 tsp. Sea salt
Spices, optional*

Place the pepitas in the food processor and leave it to pulse for 10 minutes** (scraping the sides as needed).
Once it takes a “loose dough” consistency, add the salt and continue to process for 5 minutes or until liquefied.

Makes 10 servings.

*I added pumpkin-y spices such as cinnamon, nutmeg, and sage, and sweetened it with a little stevia.
**I was pleasantly surprised how easy it was to make raw pumpkin seed butter without additional oils or sweeteners. And really, I don’t think it even took the entire 10-ish minutes to be liquid pumpkin seed goodness.

Friday, September 21, 2012

The Last Days of Summer

Summer is slowly fading into fall, a time where hoodies and leggings become a common occurrence in northern Virginia. Change. That’s that word that comes to mind with a season’s birth from its predecessor's death. The wind is crisper. The air is cleaner. The sky is temperamental and absolutely beautiful in contrast with the leaves turning color. With such amazing feats of nature, why focus on the stressful things in life?


So much is going on behind the scenes of Meals with Morri, things I am timid with sharing and bringing out into the open. The majority of it has nothing to do with food or cooking, but everything to do with moving on, wellness and healing, and personal empowerment. Luckily, I have a plethora of posts I’m really excited to share with you, such as:

  • A product review (click here)
  • A new page on the MWM site
  • Food inspirations from friends and family
  • Fermenting (which I have been doing, I swear)
  • Foodie adventures
  • Getting back into the GFRR groove
  • Health and fitness updates
  • … and so much more!

As this is the last official week of summer (when did that happen?), I thought to share a recipe or two of something I view to be the epitome of the summer months.

The smoothie.

Oh, there’s a smoothie or two on this blog already, but I feel that next summer will be the smoothie season on this blog. Blended into a drink of nutritious goodness, you can put anything in it as meal on the go. Fruits and veggies, dairy and non dairy components, powders and spices… it is so versatile and takes maybe a minute or two to go from blender to cup.

Smoothie making, what a beautiful concept indeed.

In my vigilance to lowering my coffee intake (it’s between 30 – 60 ml now), my adrenals have been grateful and my mornings are not so chaotic and manic. There are some days, though, where a pick-me-up is desired and I came up with this recipe.

Good morning, Sunshine! Smoothie

1 Frozen banana
140 g Frozen mango chunks
10 g Chia seeds
10 g Bee pollen
240 ml Filtered water*
11 g Coconut electrolytes*

Place all of the ingredients into the blender and mix until thoroughly combined.

Makes 2 servings.

* You can use anything in place of the water, such as coconut water (in which case the electrolytes wouldn’t be needed), dairy or non-dairy milk, or juice.

The following recipe was my most recent smoothie attempt. It has fresh fig in it, a fruit that I adore dried and baked but really want to learn to like them fresh. It also has açaí puree, an interesting find in my local Harris Teeter’s frozen food section. Both fruits are not overtly sweet as far a fruits go, and most certainly not tart at all. The resulting smoothie, as it was pointed out to me, tasted like a simple bowl of oatmeal made right.

I’m still figuring that statement out.

Açaí and Fig Smoothie

100 g Frozen açaí puree
4 Fresh figs *
1 Banana *
360 – 480 ml Unsweetened almond milk, depending on preference to thickness

Place all of the ingredients into the blender and mix until thoroughly combined.

Makes 2 servings.

* I would recommend freezing the figs and banana for a creamy, ice cream-like consistency, though blending them from room temperature is fine.

Monday, September 3, 2012

A September Monday Brunch

Autumn has begun to show its colors as we firmly settle into September. Certain fruits and vegetables are no longer in season, and more and more vendors at the farmers markets have signs that say, “This is the last week we are selling ___. Buy now for canning and freezing in the winter.”


Never before has my heart clenched over such an announcement. I feel that my first year of blogging was experimenting with how to make food; but as I am a quarter into my second year writing Meals with Morri posts, it has transformed into food activism, health, and gardening. I have more than recipes swirling around my head. I have plans on changing the way we look at food and where it comes from.

Farmers markets have really shifted my priorities on the food budget. Buying local, sustainable, and organic food, both from the weekend markets and stores like Trader Joe’s, are really not that much different in price when I bought solely from international markets and other stores (cheaper, even). Even more disturbing is how the quality differs, how the farmers market’s garlic is crisp and strong while the ones we used to by at the international market trekked from far lands and severely lacked in texture and flavor. You can say the same thing for just about any fruit, vegetable, dairy/meat product: the celery is greener, the mozzarella is soft and stretchy, the apples are beautifully imperfect and significantly more filling, the tomatoes are sweet and wonderfully varied in color and texture, and the herbs taste like they came from the garden that morning (which, coincidentally, they probably had).

I have my compost pile underway, and I have plans for gardening for the following year. I have graduate school to officially apply for, and I have much to study. So what better way to start a Monday morning with all of these plans and adventures in the making than a brunch to celebrate a new month and season?


When my good friend CB and I went to Toledo for the weekend, the drive was starting to get to us. By hour eight, we were tired, hungry, and the highway started to look like it would never end. Then he mentioned having a friend living a Cleveland and asked if we could make a stop to visit. I was determined to get to Toledo, but I did need to get out of the car and nap, so I agreed.

Whatever misconceptions I had about Cleveland were completely turned upside down when we entered the city. Our friend took us on tour to visit the nooks and crannies that left me in awe. Truthfully, had I eaten and slept throughout the trip, I would have been more excited to walk around and take photos. But the fact that I could walk on hour ten of our journey was a miracle in itself. Ah, well. I guess that means another trip to Ohio is in order…

He took us to this plot of land by the projects, where acres of beautiful fruits and vegetables grew in rows of outstanding abundance. I saw hops, hanging high overhead, and Brussels sprout stems bare from harvest. Carrot greens shyly rose above the soil, and kale in its confidence was lush and green.

(source)

And then there was The West Side Market and his own little garden (with chickens!), two places I really wished I had been well rested and with a camera to share their marvels with you. He took us back to his cozy apartment where I napped in the guest bedroom while the two men made breakfast for lunch. When I awoke, I came out to see them sitting on the porch with a buffet of delightful foods: fruits and cheeses, banana nut pancakes (alas, the gluteny kind), and omelets.

Now, I must mention that my appetite is wonky on long travels. I prefer to not eat, at least not too much, because I figure my lack of motion would balance it out. We had been on the road since two-thirty that morning, and having eaten at odd times, I wasn’t sure how hungry I was. And though I kept saying I wasn’t hungry, I grabbed cubes of succulent mango he purchased from the West Side Market, as well as various slices of cheese and berries. My new friend wouldn’t take no for an answer: I was eating.

He made me this amazing omelet (did I mention he was a professionally trained cook?): eggs with half and half, rainbow chard, fennel sprigs, and Havarti with dill (my absolute favorite cheese). It tasted amazing, warmed my empty stomach and tired body, and I was a brand new Morri for the remainder of our drive.

When we came back to Virginia, I was determined to recreate that delectable omelet and share it with you. Today was the perfect day to make it for the household. Where it was made for us to ease our travels, I made it for the same reasons: warmth, love, and intentions of well-being wherever my family was going.

Thank you, dear David from Ohio. I dedicate this recipe to people such as yourself and the food movement Cleveland has embraced.  

The Baked Cleveland Omelet

8 Large eggs
340 ml Whole milk*
100 g Rainbow chard, stems removed and sliced into long strips
1 Garlic clove, finely chopped
120 g Havarti with dill, divided in half and thinly sliced or grated
1 – 2 tbsp. Fennel sprigs, finely chopped
Sea salt, to taste

Preheat the oven to 350ºF.
In a medium-sized bowl, thoroughly blend the eggs and milk and set aside.
Grease a deep dish 8 x 8” pan with coconut oil and layer the ingredients in the following order: chard, garlic, 60 g of the Havarti, the egg mixture, the fennel sprigs, and the remaining 60 g of Havarti (or more if you want a cheesier top).
Bake for thirty minutes, until bubbling and firm when pierced in the center with a knife.
Turn off the oven and let it sit there for an additional five minutes.
Slice to the serving sizes of your preference and serve warm over rice.

Makes 4 – 8 servings, depending on meal.

* As I said, you can also use half and half or whatever "milk" you happen to have on hand. The raw milk we purchased from the Amish was starting to sour, so I used it for this recipe. 

Friday, November 25, 2011

Turkey Day Round-Up

Thanksgiving. A holiday focused on food, family, food, getting together, food, telling stories, food, and more food. I mentioned the food, right? 

My Leftovers Day Plate

Good.

I only had class on Monday this week, so much of my time was spent cleaning, cooking, and nervously awaiting the arrival of our other guests. We were eight around the table: Mama Dazz, the Burt-man, Grandpa B, Grandma D, Uncle Rich, myself, and the boyfriend’s father and brother. He came later in the evening, back from his five-day excursion in Mexico.  The energy at the table was enormous, and food was plentiful and beyond delicious. It wasn’t completely Morri friendly, and being grain-free and sweetener free made it slightly more difficult (I indulged with a sliver of pie), but the food that I could and did eat did not leave me wanting. Plus, it was my first Thanksgiving back from Sweden, so I was just tickled pink to be there.

First and foremost, the Turkey, a bird named after the country the English believed it originated (The Turks called it the Hindu, I think, though the bird comes from Northern America). We typically buy the all-natural Trader Joe’s turkey each year, which came with its own brine. Only, upon further inspection, I realized that the brine wasn’t Morri friendly because of the sugar, so we ended up getting the smaller and yes, more expensive Kosher bird. 


Regardless, it was totally worth the extra few bucks, because not only did it taste amazing but it occurred to us that maybe the bird was raised and fed differently due to its, uh, Kosher-ness. It wasn’t some hulking, too-big-for-its-own-legs, obese thing. It was smaller, with some of the feathers in the skin, and juicier than I remember turkey ever being. Next year, I’m going to look in buying a Morri friendly bird online and see where that goes.

As I was going grain-free, I decided not to make a gluten free stuffing which, until I got sick earlier this month, I was making it with a spoon bread base. Instead of putting it in the bird it was baked like a huge bread pudding and a whole onion was put in its place. The onion was my “stuffing”.


There were two kinds of greens, my Uncle Rich’s infamous collard greens, cooked with salted fatback, water, pepper flakes, and salt and pepper, and I made green beans with a delish twist, and whose recipe will be posted shortly.

Like many Thanksgiving dinners around the United States, our menu was rather heavy on the carbohydrates, but I think we did rather well in bringing color and balance to the table. Instead of mashed potatoes, we went with “small” sweet potatoes, baked at 400 ºF for 1.5 to 2 hours. The result is a caramelized and sticky exterior with a gooey middle that melts in your mouth. 


We had two sauces, turkey gravy and cranberry sauce, both homemade, grain-free, and definitely not out of a can. I'm doing my best not to brag too inanely, but our cranberry sauce was beyond amazing, and I wish I had written down the recipe (we used this one for inspiration). Mama Dazz started off with two bags of fresh cranberries, used two cups of orange juice instead of water to cook them, and finished it off with fresh orange pieces and walnuts. Before adding sugar to the whole thing she poured a bit into two ramekins, one for me and one for Grandma D, who has diabetes. I personally liked it unsweetened, but she used a sweetener for hers.


Except for the turkey and Uncle Rich’s collards, I was surprised that most of the things I put on my plate (and made) were vegan. Then again, since everything was mixed into a tasty jamboree of flavors, I guess it wasn’t so vegan after all. Oh well…

As for drinks, I made two kinds of ice tea, Irish Breakfast (caffeinated) and Green Rooibos (non-caffeinated), and poured them into wine bottles for a change of pace. We also had chilled white wines, a 2010 Da Vinci Chianti Big Sergey brought (along with pink roses), and sparkling apple cider. 

Mama Dazz's Apple-Quince Pie (Not GF)
Mama Dazz's Sorghum Pecan Pie (Not GF)

Dessert was a Thanksgiving feast in its own right, with four (count 'em, four) different pies, vanilla ice cream, homemade unsweetened whipped cream, and lots of coffee. Mama Dazz made Grandma D her own special single-serving berry pie as one, but she also made pecan pie and an apple-quince pie for the gluten eating crowd. I made a gluten-free pumpkin pie with a dairy free filling, using the second half of the pie crust recipe I made for last month’s Gluten Free Ratio Rally.

Grandma D's Three Berry Pie
My GF Pumpkin Pie!

It was weird having pie, with its not-so-much grain-free crust and honey sweetened filling, not to mention eating more than one fruit serving a day (the cranberry sauce was my second serving). After we picked him up from the airport, I ate a tiny sliver of my pie while he ate a reheated plate of amazing deliciousness. I felt loopy and slightly intoxicated after that, and my stomach didn’t know what to make of it. It wasn’t a bad feeling, though I did feel off. I think having a grain-free/sweetener free/limited fruit servings diet for a while may help, but it may end up becoming a long-term thing. FiveLac has been helpful; I just don’t want to take 3 – 6 packets every day for the rest of my life. And as long as I have garbanzo bean flour, I'm golden.

All in all, this Thanksgiving gave me a lot to be thankful for; you know, besides being thankful for the family I have. For my birthday I have this idea that, for every year after my birthday that’s the number of hours I give to doing community service (i.e., I’m twenty-two, so this year I do at minimum twenty-two hours). I am thankful that my lifestyle enables me to do that. I am thankful for the world I live in, for the people in it, and for the life I lead. I am thankful for every experience, every lesson, every mistake, and every success. I am thankful for my education, for my job, and for my bright today and the tomorrows that follow.

I am thankful for this year’s harvest, whatever that may be.

I end this post with a Happy Day After Thanksgiving to you all. May you have food in your cupboards and pantries all year long, a roof over your heads and a fireplace to keep you warm and dry, and finally, an open heart that grows with each passing day.


Dijon Green Beans with Almonds and Mushrooms (adapted from this recipe)

1 lb 8 oz French-cut green beans, preferably frozen
10 oz Baby Bella mushrooms, thinly sliced
1 oz Almond slivers
1 oz Coconut oil
5 Garlic cloves, left whole
1/2 tsp. Sea salt
1/2 tsp. Cracked pepper
Dash nutmeg
2 oz Dijon mustard

Put a large pot over medium heat and add the coconut oil.
Sautee the mushrooms, almond slivers, and the garlic cloves until thoroughly cooked and browned (careful, though, the almonds can burn if you are not watching).
Add in the green beans and stir until the ingredients are completely integrated.
Cover the pan with a lid and lower the heat to medium or medium-low for up to three minutes.
Pour in the spices and Dijon mustard in the final minutes of cooking (i.e. the green beans are still a vibrant green and lukewarm).
After it has cooked, let it sit for five minutes before serving.

Serves 8 – 10 people as a side dish, with a very likely chance of leftovers.

Monday, October 31, 2011

Halloween Treats without the Tricks: Honey Caramel Apples

I look forward to this holiday every year. Maybe it’s the walk around the neighborhood in costume, knocking on doors and with a squeaky voice shouting “Trick or treat!” My most memorable years were the times I dressed as Odette from The Swan Princess (Mama Dazz made the costume), the Pink Power Ranger, and a black cat. Sure, I celebrated more Halloweens than those three, but I remember them because those were the years of suburbia, where practically every house gave candy by the handfuls and there was a haunted house on every street. Like other munchkins under the age of seven, I was always afraid of the haunted houses, especially when the front yard of the house at the top of the hill became a graveyard for the undead. But for two or three hours on Halloween, kids are empowered to honor their costumes and face their fears. After all, nothing bad happens to a princess, and no one would dare attack one of the Power Rangers. And black cats own the night, so I was safe that year.


After high school, however, Halloween started to shift in regards to priority. I mean, why walk around all evening for candy you could buy half price the next day? And the costumes for tween girls and older seem to have become something different than I remember them being. I think know I’m too old to go trick or treating, but I have taken on the responsibility of giving out candy every time munchkins come to our door.

I must admit, though, I do miss the Halloween of my childhood, and that does include the ungodly amount of sugar, artificial coloring, and chocolate. For years my favorite candy was the eyeball gumball, though it became hard to find after a time. And when I moved to an international neighborhood, fewer and fewer houses celebrated the trick-or-treating tradition, I was slowly weaned from my once a year candy indulgence.

The word candy has changed since my gluten free lifestyle included soy, artificial anything, and refined sugar. Chocolate has become a little iffy for me, likely due to how it’s processed, so I’ve been using mesquite flour instead. But after making those gooey pepitas candy squares last week, my definition of candy has altered completely.


Candy doesn’t have to be artificially flavored, sweetened with HFCS, or gluten filled. It can be tasteful, healthy by candy standards, and delicious for munchkins and adult munchkins alike. I have become inspired, by the science of making candy and the turnouts of making candy. Sugarplums may not be dancing in my head, but honey sweetened chocolate bars, maple fruit juice lollipops, homemade white chocolate, and “candied” ginger are. My hopes for my children for this time of year are homemade delights, original costumes, and close-knit community Halloween fun. Until then, I just may do that for today’s kiddies, but by all means enjoy this certified gluten free candy list for tonight’s festivities.

So why am I talking about candy? Well, I made caramel apples… with honey. And after boiling over in a small saucepan and transferring the mixture and a half (because I boiled over, remember) to a slightly larger saucepan that I couldn’t heat up past 225ºF without going over, I finally found the right pot. So bear in mind, when they say size matters in candy making, they mean it. The recipe not only worked, it was amazing. It is rich, decadent, and had this butterscotch beginning with a caramel ending. I’m sure agave nectar and maple syrup would work wonders, and I’ll try again just in time for the winter holidays.

Who knows? Maybe candy canes are in the future. Happy Halloween, everyone!

Caramel Apples (recipe from Our Best Bites)

1 c. (252 g or < 8.9 oz) Honey
1 c. (240 g or 6.5 oz) Heavy whipping cream 
1/2 tsp. Bourbon vanilla
1/4 tsp. Sea salt

10 sm. Jazz apples (Trader Joe’s Small Apples for Small Hands)
10 skewers or popsicle sticks

In a heavy saucepan over medium heat, combine cream, honey, and salt.
Once warmed and whisked together, bring to a rolling boil and reduce heat to a simmer (it should still be bubbling, but not so hot that is splatters all over).
Stir and scrape sides of pot down occasionally until a candy thermometer reaches 260 degrees.
To reach 260ºF can take about 30 minutes, so while your caramel is cooking prepare your apples by washing and drying them and skewer them with a popsicle stick or bamboo skewer, then place in the fridge to continue chilling until ready to use.
Line a baking sheet or cutting board with waxed paper or parchment paper and set aside.
When caramel has reached 260ºF, remove from heat and let sit for 5 minutes, stirring occasionally (It should start thickening).

(You’ll have to eyeball the consistency for dipping. If you’d like to help it along you can place your pot in a bowl of ice. And if it gets too hard to coat the apples, just return it to the heat until it’s thin again.)

Remove apples from fridge and dry them thoroughly with a towel.
Dip in caramel, rolling and twirling each one so it gets well coated.
Let excess drip off and then place on prepared sheet.
Refrigerate for 10-20 minutes to set the caramel and then enjoy!

Makes 10 caramel apples.

Tuesday, October 25, 2011

Halloween Treats without the Tricks: Gooey Pepitas Candy Squares

In honor of keeping my promise to post delectable autumn treats in time for Halloween, I wanted to try something new but simple, easy to make but will always be fashionable. Of course, I’m talking about candy, but candy that I wanted to feel good about eating.

Kelly of The Spunky Coconut is a genius when it comes to making healthy sweets. Bean brownies, caramel sauce made with maple syrup and honey alone, a plethora of cookies, casein-free or vegan gingerbread men… sheer brilliance. 


I view her blog daily, so when she came up with a Halloween Spunky Holiday round-up, I just knew I had to participate. That, and I wanted to get into the trick-or-treat spirit. I started thinking of traditional fall flavors, including traditional Halloween dishes more on the savory side. There were bags of raw pepitas in the pantry and bottles of honey in the cabinet, two things that came together in a beautiful way.

Regardless of what sugars you use in candy making, the temperature you cook it at is still the same. This candy making adventure had empowered me, because I thought such sweet delights were never to grace my taste buds again. Let out your inner scientist, fellow food lovers, and you will always find a way to make things happen.

I found this gem of a recipe at Food Mayhem, and it is important that you follow the directions. Candy making is a very finicky thing indeed, but don’t be intimidated by it. And now that I know honey is great candy base, I can’t wait to make honey lollipops, caramel, and so much more. This particular recipe looks like a great addition to a bowl of pumpkin ice cream for dessert or as a side to a hot cup of tea in the afternoon.


Gooey Pepitas Candy Squares

189 g (< 6.7 oz) Clover honey (for vegans, I suggest maple syrup or agave nectar)
7 oz Raw pepitas
1/4 tsp. Sea salt (I used Trader Joe’s Smoked Sea Salt, which gave it a nice flavor)

Pour the honey in a medium saucepan and bring to a boil on medium heat, occasionally stirring.
Once it is at a boil, leave it alone with the candy thermometer in it and wait until it gets at 270 – 290ºF for sticky candy (as I did, around 280ºF) or 300 – 310ºF for hard crack candy.
Empty the pepitas in and stir quickly to coat, and spread onto a baking sheet lined with parchment paper to an even layer (this is easy to do with a greased silicone icing spatula).
Set aside to cool and harden for 40 minutes to an hour.
Place the parchment paper on a large cutting board and cut the candy into any size and shape you like (I made 3-bite squares).
Store in an airtight container between sheets of parchment/wax paper.

Makes 15 – 30 candy squares.

Monday, October 3, 2011

Embracing October with a Basic Breakfast Bake

It seemed like the spirit of autumn came along just in time for the month of October, and I am instantly reminiscent of Sweden. There is crispness to the chilled air that brings me back to Scandinavia, and my heart aches for a traditional fika and a stroll in the woods surrounding the campus in Växjö. Soon I will have to bundle up and wear acceptable shoes for a day trip to the pumpkin patch in the near future, but for now I’m enjoying the warmth of the house and the cat sitting on my lap.  

The air conditioner is officially off for the next two seasons, and with the awakening of the heating system came dust that once lay dormant in the ducts. To end a perfectly calm first weekend of October was cleaning, dusting (and sneezing), organizing, moving, and cooking. Actually, it was a lot of cooking, and a lot of planning for this month’s cooking endeavors.


Mama Dazz knows the fall season is my favorite season of all, and as a treat won me a collection of some fabulous cookware on eBay. They are copper tinted bowls, pie dishes, and casserole dishes that had been in someone’s attic for decades (never used and with their individual stickers still intact). Soon to come in the next few days are my lemon yellow ramekins in a number of sizes and depths, of which I will celebrate by making baked ziti, shepherd’s pie, various desserts, breakfast bakes, and so much more. It is no coincidence that my bakeware came just in time for canned pumpkin to come to Trader Joe’s. Oh yes, there is going to be many recipes with pumpkin in it over the next two months, with pies, smoothies, breads, pancakes, sauces, breakfast bakes, and… do you hear growling? Either it’s something celebrating Halloween early under the bed or my stomach is getting hungry for pumpkin.

Anyway, I want to introduce to you my first breakfast bake. It’s just the base, but I think I’m starting to get the hang of it. The bowls were a tad small to put the batter into one (believe me, I tried), so I ended up with two small bran muffin looking breakfast bakes that were oh-so delicious and filling with a smidgeon of honey on top.


Basic Breakfast Bake

20 g (or 1.5 tbsp.) Kasha
22 g  (or 1.5 tbsp.) CGF steel cut oats
1 tbsp. Chia seeds
1 tbsp. Flaxseed meal
1 tbsp. Unsweetened applesauce
1 tsp. Unrefined apple cider vinegar
2 oz Water
1/2 tsp. Baking powder
1/4 tsp. Baking soda
1 egg
10 g Butter

Combine the kasha, oats, chia seeds, flaxseed meal, applesauce, vinegar, and water in a smallish mixing bowl and let it sit covered overnight.
Preheat the oven to 350ºF.
Add in the baking powder, baking soda, and egg into the batter.
Melt the butter in a small saucepan (or microwave if you use it), and let it cool for a minute or so once liquefied.
Empty the melted butter into the bowl and evenly coat the edges of your baking dish, and pour the rest in with the mixture.
Transfer the batter into the dish and bake for thirty minutes or until cooked through.
Serve with honey, your choice of fruits, peanut butter and fruit preserves, or a drizzle of milk on top in a bowl.

Serves 1.

Friday, September 30, 2011

Chunky Roasted Tomato Soup

I swear to you, I have been cooking. I’ve been cooking a lot. In fact, I think I’ve been cooking more so than usual. But after being sick for roughly two weeks, school came first – that, and meetings… oh, and working out too – and taking photos was just something I didn’t have time for. I did quite a few Bento Box Snapshot worthy recipes, and I had many recipes I wanted to try in attempt to get the family out of our meal rut. However, sometimes I either had too few of the ingredients I needed or didn’t have the majority of the ingredients to begin with, so the recipes I was eager to make, photograph, and post were merely written down for another day.


There were also a lot of “What would happen if…?” moments in the kitchen. In other words, I simply threw things together to see the result of said experiment. They often turned into a “Not Quite What I Was Expecting” when it was still edible and delicious. And in some cases they were regarded as “Flops”, or "Not Quite What I Was Expecting" meals that weren’t edible or delicious at all. The latter, thankfully, happens few and far between but it still happens.

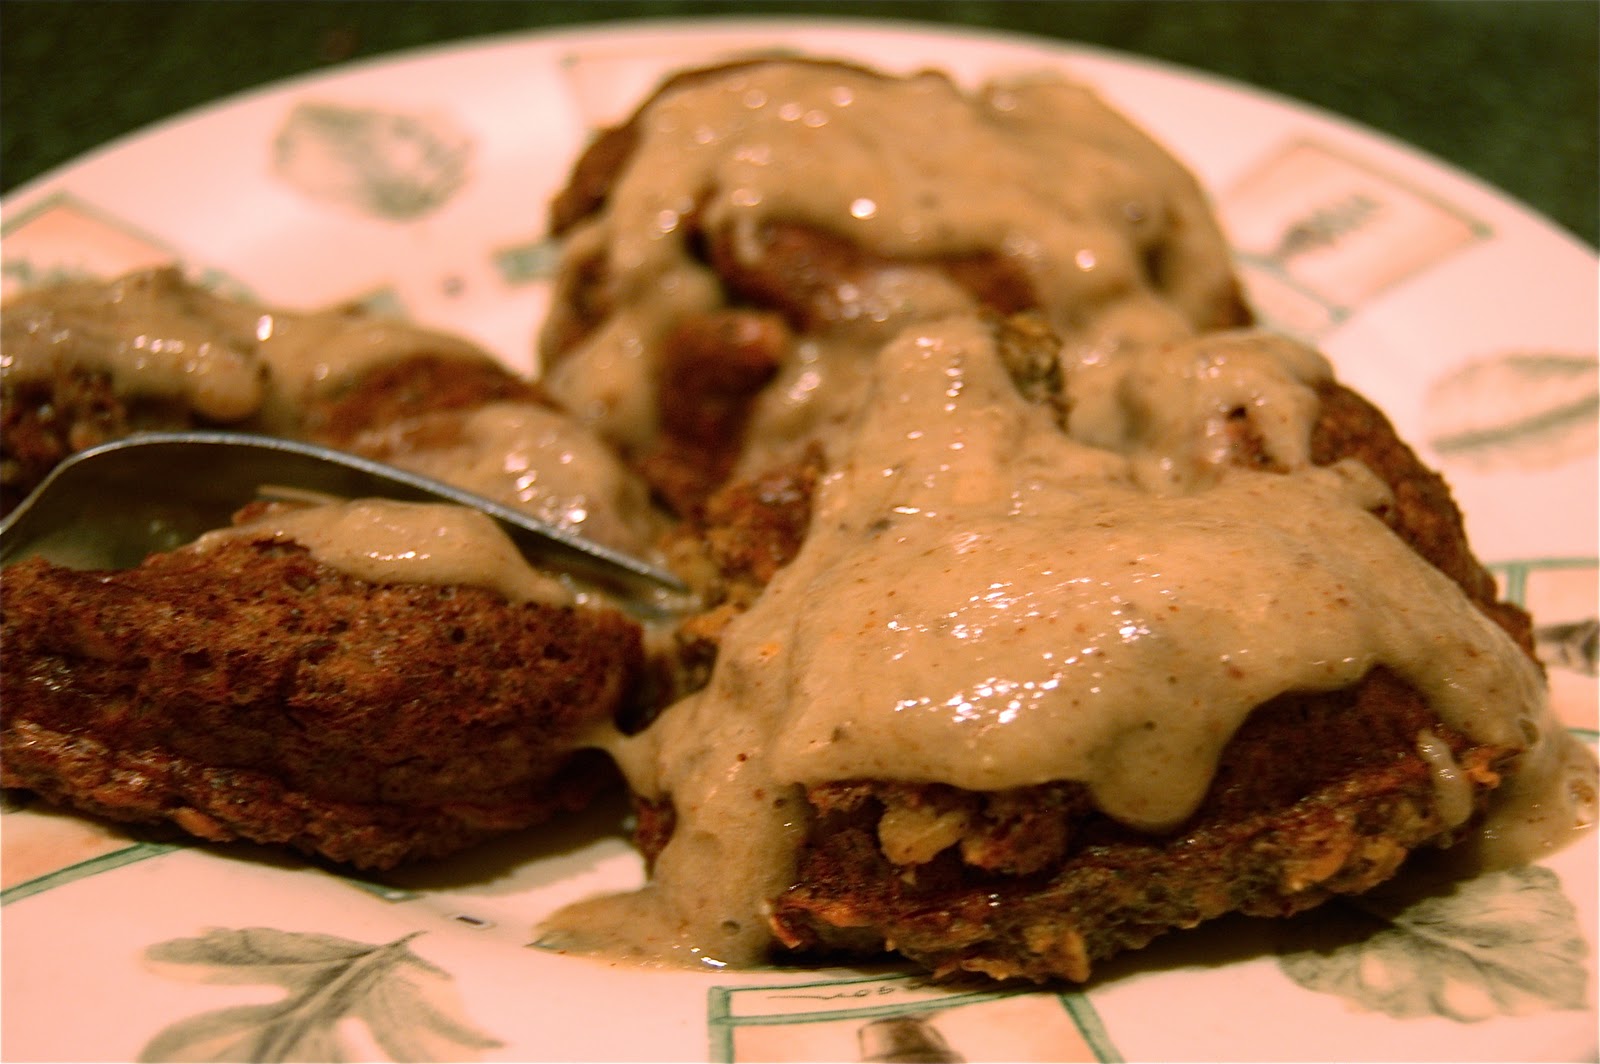
Buttermilk Oatmeal Donuts with a Banana-Almond Butter Sauce

My Bento Box Snapshots have been Stew-Salad combinations. There was the hearty beef and vegetable stew with salad. There was also kabocha soup (or puree) with almond milk mixed in for a silky texture with seasoned buttery rice, black beans, and a salad. I’ve noticed I’m not as hungry after dinner as I used to be, and I don’t feel guilty about eating when I am still hungry. So far, I’m dreaming zombie free dreams and not ravenous in the mornings.  

I have plans and deadlines for recipes this weekend, so be prepared for an onslaught of tastiness. This is where I’d laugh maniacally in a villainous fashion, but something tells me you all won’t mind it so much. In the meantime, as September comes to a close, I’d like to tell you what I’ve learned.

  1. I learned that my getting up early was the result of drinking coffee in the afternoon. Once I cut down my caffeine to the mornings, I’m sleeping deeper… and longer.
  2. I learned that my zombie nightmares were the result of my being hungry while I slept. I started eating more (either with bigger meals around 500 calories or by snacking), and I’ve yet to see a rotting corpse.
  3. I learned that eating more doesn’t mean I’m going to gain weight. It means I’m not hungry and starving myself. It also means I am back on a normal menstrual cycle (hopefully).
  4. I learned that spirulina and chlorella are great detoxifiers and have the minerals I've been lacking for much too long.
  5. I learned that I’ve been feeling detached from the people I love, simply because people are living their own lives as I am, so cooking has been my outlet in order to feel an intimate connection. (Ah, the joys of being a commuter student about to graduate in a few months.)
  6. I learned to be persistent and not to be afraid to make a flop or two. It’s a proven fact that the more you flop the more likely you’re to find success.
  7. I learned that feeling good means you’re honest with others and yourself. After the trials and errors revolving around my health, social, exercising, and eating habits, I’m not afraid to respectfully tell people how I feel.
  8. I learned that there are directions in recipes for a reason. Read every line thoroughly… and twice.
  9. I learned that socca. Is. Delicious. I haven't perfected it yet, but the Pure2Raw twins Lori and Michelle have definitely made me a lover of the stuff.

And that homemade roasted tomato soup which could be made into a bangin’ sauce that just so happens to be vegan? So yummy.

Chunky Roasted Tomato Soup

1 lb 4 oz (or 6 3.5 oz) tomatoes, halved
1 (11 oz) Red bell pepper, halved and seeded
1 (6 oz) Sweet Spanish onion, peeled and halved
4 garlic cloves
2 oz Olive oil
24 oz Water
6 oz Tomato paste
3/4 tsp. – 1 tsp. Water
1 Bay Leaf
Preheat the oven to 375ºF.
Lay the veggies on a foil-lined large baking sheet, and lightly drizzle the olive oil on top.
Cook for about an hour or until they are soft and bubbling. (For a more roasted flavor, place veggies under the broiler until blistered and blackened in some places.)
Remove the baking sheet from the oven and place the veggies into a medium-sized soup pot.
Add the water, tomato paste, salt, and bay leaf and cook on medium-high heat for at least fifteen minutes.
Remove from heat (and the bay leaf from the pot) and, while hot, use a hand blender to puree the veggies. (If you want to use your regular blender, you can do that also for a smoother soup consistency).
Serve immediately topped with finely cut basil and/or sour cream.

Makes 6 small servings (or 3 large servings).

*To make it into a sauce, reduce the water to 16 oz and add 1/2 tsp. each oregano, thyme, and herb de Provence.

Wednesday, September 21, 2011

Beef Stroganoff


I have been very quiet since Friday, likely due to getting caught in one of autumn’s chilly nights without any notice and getting sick. Either I was wearing clothes reminiscent to summer (gym wear and flip flops) or someone who had it within my proximity passed it along to me. Regardless, I came down with some flu-cold combination and blogging was not my top priority. 


Luckily I was able to celebrate Mama Dazz’s birthday and hang out with friends that was long overdue. Saturday, the day I started feeling rather worn down and achy, was also my “experimenting in the kitchen success story” day. For her birthday I made her favorite pizza (with a yummy gluten free crust I made from scratch!) and a strawberry labneh cheesecake. Flamingos, sunflowers, and stargazer lilies were in abundance, and the house is slowly coming out of its clustered funk. 


Despite losing the desire to do much of anything (because sneezing and coughing and being delirious can do that to you), the creativity in my meals seemed to thrive. It was based on comfort, on the need to feel full and warm. I felt feverish and clammy, though my temperature varied from 96.7ºF and 98.4ºF. My digestion was even more temperamental than usual; actually, it was similar to the experience of being glutened. I was ravenous and extremely dehydrated throughout the day, eating to fill the emptiness in my stomach and drinking ease the dryness in my throat. I ate things that I remembered loving as a kid, meals served in a large mug or bowl, piping hot, sure to make any upset or sour stomach grateful for the nutrition.

And it all started with beef stroganoff.

Since becoming gluten free I had an issue with thickeners. It was similar to my issue with adding sugar to something naturally sweet already; why include something to make it a thicker consistency when it was delicious as is? Chili did just fine without that tablespoon or two of cornstarch, but for some reason beef stroganoff needed a slurry or roux to keep the sour cream from curdling when mixed with the broth. After recently making coq au vin, I realized the significance of the thickening process I once despised, and started incorporating it back into recipes that usually call for it.

This dish has its origins from 19th century Russia. Elena Molokhovets’ cookbook A Gift to Young Housewives (1861) was the first to provide the recipe in print, and the name is believed to derive from someone of importance within the Stroganov family. It has many variations around the world and is very popular in the United States, the UK, Scandinavia, Iran, Australia, Portugal, China, Japan, and Brazil. We used to eat it over egg noodles in the BGF days, but I found out it is just as delicious served over sprouted brown and wild rice.

Beef Stroganoff (Pressure Cooker version)

1 tbsp. Olive oil
10 oz Baby Bella mushrooms, thinly sliced
1 Sweet white onion, julienned and thinly chopped
1 Shallot, julienned and thinly chopped
3 Garlic cloves, coarsely chopped
1 tbsp. Chives, coarsely chopped
32 oz Water
1.5 lb Lean stew beef meat, cut into manageable chunks
1/2 tsp. Sea salt
1/4 tsp. Cracked pepper
1 tsp. Herb de Provence
1/2 tsp. Mustard Seed Powder
3 tbsp. Rice flour
9 oz Sour cream

Place the olive oil in the pressure cooker over medium-high heat and sauté the mushrooms, onion, shallot, garlic, and chives until softened and reduced.
Pour in the water and bring to a boil, then the meat and spices (sans the rice flour and sour cream).
Put the lid on the pressure cooker, and lower the heat to medium-low, cooking for at least half an hour.
Turn off the heat and let the pressure reduce on its own until the lid can be opened.
Take at least a cup of the broth and pour it into a small mixing bowl with the rice flour to make a slurry.
Turn the heat back on to medium-low, add in the slurry, and let the broth thicken for an additional 15 – 20 minutes.
After the broth has thickened, turn off the heat once more and fold in the sour cream until thoroughly combined.
Immediately serve over rice or your choice in pasta, garnished with fresh chives or spring onion.

Serves 4 – 6 people.