Showing posts with label bread. Show all posts

Sunday, October 20, 2013

All Work and No Play

The Burt-man recently asked me if I have enough fun. It’s the sort of question that hits you in the face like cold water in the mornings. It wakes you up. It makes you think.


I go to school full time. In grad school terms, that’s nine credits or higher. That’s nine hours in the classroom, six of them being in the late evening. I then devote three days to studying, one for each class, and studying (as well as paper writing and presentation making) can take up to fifteen hours in total. I also work part-time; nothing fancy, just twelve hours three days a week. It takes my mind off school and it’s one of the best jobs I’ve ever had, but it’s still a job. It still takes a lot of energy to be present for the kids as well as my co-workers.

If we add it all together, plus the time it takes to commute, school and work equal to a full-time job. (Mad respect for grad school students who are parents and/or with full-time careers. You guys are the kings and queens of time management.)

Due to the change in my schedule this semester, this meant I had to stop rock climbing for a while. (I just about cried when I told SportRock I needed to freeze my account.) I couldn’t make the time to go in the evenings, because by that point I was exhausted and all I wanted to do was read another novel from Terry Pratchett’s Discworld series. My mornings have been devoted to sleeping eight hours, and simply just chilling out or working on projects. I barely had the energy to do Insanity, let alone to go out and see people and go on adventures. I’ve never been so appreciative of my bed before this semester, or sleeping in general.

I'm so jealous that my cats can literally sleep whenever they want.

It’s the final stretch towards obtaining my Masters Degree, and it has me hyperfocusing so narrowly that I literally have to schedule fun and force myself out the door to have it. Don’t get me wrong; I love my classes and my job. I enjoy the readings, the discussions, and being in the classroom. I cherish the time I have with the kids and my friends at work. But the Burt-man’s question irked me, because it’s true. I’ve forgotten how to have spontaneous fun without the fear of procrastination and motivation looming over my head.

Fun became an expense. I couldn't afford it anymore.


I also have been preparing for my internship in 2014. Yes, I got an internship. In Malta. For a year. I have never been so excited and so terrified for anything before. I will be leaving in early December to settle into this new chapter of my life. So along with the typical week I mentioned, I also have a year of being abroad to consider: what to pack, what paperwork is needed, where I’ll be living, how I will need to budget, etc. I considered doing distance-learning classes along with the internship and my school’s requirements for internship credit in the spring, but decided against it. Why? Because I’m going to be in Malta, that’s why! Because my internship is a forty-hour workweek, and because I want to do my best and still have fun while I’m there.

So with papers and projects coming up (or in one class’s case, a midterm due tomorrow), I am getting myself in the writing groove by writing this post and talking about emotional health.  Guys, everyone needs fun for themselves, even when your schoolwork and your job are things you look forward to every day. You need time (or a day) to yourself to do things for you. That’s why I’m getting myself out of this motivation rut and will set aside time to myself every day to make fun and be creative. If you focus on all the things that have to get done, nothing ever will. Recipes won't happen. Grades will start slipping. Depression and illness will settle in. Work will seem like a chore. 

So I'm having fun this fall. I'm making time and I'm making meals again.

Autumn is my favorite season. I love the crisp in the air, the color changing in the leaves, and the seasonal crops on the shelves and in the farmers markets. Virginia is bursting with apples, squash, and dark leafy greens, and I wanted to honor that with a dish. It’s a casserole that will keep you warm on those rainy days and chilly evenings. I call it the Three Sisters Casserole because it has corn, squash, and legumes in it, but you can most certainly taste the autumn in every bite.

Three Sisters Casserole

Pumpkin Cornbread batter*
227 g Cooked black beans
1 Medium Zucchini, thinly sliced
200 g Kale, coarsely chopped
3 (240 g) Chicken Thighs, cooked and coarsely chopped**
1 Yellow onion, halved and cut into thin crescents
3 Garlic cloves, coarsely chopped
1/2 tsp. Sea salt
Dash of Sage
50 g Parmesan cheese

Preheat the oven to 425°F.
In a medium sized bowl, combined the dry ingredients and then the wet ingredients of the pumpkin cornbread batter and set aside.
In a large pot (or stainless steel wok) on medium heat, pour a tablespoon of your cooking oil of choice.
Upon smoking temperature, sauté the onion, garlic, zucchini, and kale and cook until soft.
Add the beans and chicken and continue cooking on medium-low heat for five minutes and add the sea salt and the sage.
Turn off the heat and sprinkle the Parmesan cheese on top.
Pour the batter over top and bake for 25 – 30 minutes, or until the crust is golden brown and it is cooked all the way through.

Serves 4 – 6.
*Pumpkin Cornbread
90 g Sorghum flour
1 tsp. Baking soda
1 tsp. Unrefined Apple Cider Vinegar
21 g Honey
3/4 tsp. Sea salt
150 g Masa flour
2 Large eggs
15 g Ghee (or melted butter)
250 ml Whole Milk
250 ml Water
200 g Pumpkin puree

Prepare as you would your typical cornbread recipe, which can be found here.

**Vegetarian, you say? No problem! Simply replace the chicken with another 240 g of cooked beans. You can also substitute it with mushrooms, butternut squash, more cheese, or additional veggies.

Wednesday, December 5, 2012

Getting Ready for the Holidays

So many things are happening today. Today is the last official day of the semester for attending classes. Today is the first official day I start my final paper(s). Today is the day I start setting up the tree and decorating my home. Today is also the Gluten Free Ratio Rally. 


That’s a lot going on in a Wednesday.

Despite the weird weather, the Yuletide spirit has found a place in my heart to stay for the winter months to come. I’ve winterized my blog and am craving hot cocoa (chocolate in general) like it was going out of style. Recipes are dancing around in my head like little sugarplums, as well as Christmas gift ideas and holiday traveling coming up. December is the month of slowing down and keeping warm, either with scarves, in the arms of loved ones, or eating something straight from the oven.

Focaccia on a December morning can be just as satisfying as a gingerbread man with warm milk. As I am partial to flatbreads in general, particularly because they don’t usually need or require yeast, so participating in this month's GFRR seemed like the perfect start to a wonderful winter. 


Like many breads, focaccia is a fairly old concept. Taken from an interesting article titled “A Short History of Focaccia Bread”:
Most historians believe that Focaccia originated with either the Etruscans of North Central Italy prior to the Roman Empire or in Ancient Greece at the beginning of the first millennium BC. Although flat unleavened bread has been made throughout the Middle East extending to Persia for this long as well and identifying a specific culture behind the first focaccia loaves is almost impossible. Focaccia bread is slightly different because the loaf rises slightly so it’s not traditionally unleavened bread and the focaccia recipe is mostly unknown in the Middle East, yet it has a history of being prepared in Turkey, Italy, Greece, Spain and France.
This is why I love learning about foods from other countries: you can find similarities in many cultures yet appreciate the regional differences that make certain dishes unique. This can be seen in the herbs they use, the way they bake it, the way they eat it, and additional ingredients seen nowhere else but there in particular. You’ll never get the same bread twice.


Every time I partake in the GFRR, I’m reminded how creative we get to be once a ratio is established. Instead of worrying how to modify a recipe's basic equation, I get to think of variations, flavors, and techniques. I get to think how I’m going to make it, if I need supplementary ingredients or not, and in what way I’m going to enjoy it. Sure, my focaccia dough was similar in consistency with a thick brownie batter (and looked like it too), but the final product was definitely focaccia. It was chewy yet moist, textured yet smooth, and easily sliced to make a small peanut butter sandwich when put to the “Is this sandwich bread material?” test.   

The ratio I used for the focaccia came from my Williams-Sonoma Cooking at Home (2010) cookbook: 3 parts flour to 2 parts liquid, with a little oil and leavening agents added to the mix. Since certain yeast strands affect my body negatively, I used baking soda and unrefined apple cider vinegar for the slight rising affect I wanted. I also brushed coconut oil on top at various stages of the cooking process, resulting in a chewy exterior that I oh so love in a flatbread.

I also went a different route in this month's GFRR, a sweeter route. This is definitely a bread pudding, French toast, fruit crisp topping, and sweet sandwich base to enjoy, especially as the days (hopefully) get colder.

Sweet Cinnamon Raisin Focaccia Bread

100 g CGF Rolled oats
100 g Short grain brown rice
100 g Quinoa (I used a combination of white, black, and red)
100 g Garbanzo bean flour
25 g Raw cacao powder (cocoa powder is fine)
25 g Flaxseed meal
300 ml Filtered water
1 tsp. Sea salt
1 tsp. Bourbon vanilla extract
1/2 tsp. Cinnamon
1/2 tsp. Baking soda
1/2 tsp. Unrefined apple cider vinegar
320 g Thompson raisins
 Soak the whole grains (oats, rice, and quinoa) in filtered water with whey or apple cider vinegar overnight to twenty-four hours.
Preheat the oven to 400°F
Drain the excess water from the grains and put it through the food processor/blender with half of the water (it may leak if you use all of it at once).
Once blended, pour the mixture into a large mixing bowl and stir in the remaining ingredients excluding for the coconut oil (the dough will appear like a thicker version of quick bread batter).
Transfer the dough to an 8” x 12” baking pan lined with parchment paper and brush the top with coconut oil.
Bake for 30 minutes, continuing to brush the crust with oil at ten-minute increments.
Remove from the oven to cool for fifteen minutes before cutting.
Serve warm.

Makes 8 – 12 servings.

Before I give you all the links to other participants’ entries, I want to give a quick shout out to the person behind this month’s GFRR. Heather of Discovering the Extraordinary is a blogger who is an inspiration to many. After being diagnosed with gluten sensitivity in October 2011, she set out to create delicious foods her body would enjoy regardless of her “restrictions” (Sound familiar?). She encourages her readers to play with their food, to have fun while experimenting in the kitchen, and to discover the extraordinary. Thank you, Heather, for giving us a challenge that made the season even brighter.

*Heather | Discovering the Extraordinary    Rosemary and Garlic Focaccia Bread   
Carol | Goodness Gluten Free    Gluten Free Garlic and Parmesean Focaccia   
Morri (Me!) | Meals with Morri    Sweet Cinnamon Raisin Focaccia Bread    
mary fran | frannycakes    Gluten Free Sage Foccacia    
Aunt Mae (aka ~Mrs. R) | Honey from Flinty Rocks    Focaccia Bread   
Silvana | Silvana's Kitchen    Sun-Dried Tomato and Olive Focaccia  
TR | No One Likes Crumbley Cookies    Gluten Free Cheesy Herb Focaccia      

Thursday, November 29, 2012

At the Thanksgiving Table

Thanksgiving was a week ago and I still haven’t posted my Turkey Day recipes. Even with the oven going wonky on our four pies, the turkey itself turned out as amazing as we’d hoped it would, and our other oven-based delights were baked in our “small” convection oven instead. My vacation from school and work was filled with love and great food, with traveling and new experiences, with wonderful lessons and deeper friendships made. It’s the kind of thing you will remember for the rest of your life, something you will always be grateful for specifically. 


Now that’s my kind of Thanksgiving. (If you are interested, click here to for a glimpse of last year's Turkey Day round-up.) 


As always, Uncle R brought his infamous pot of collards to share. Meanwhile Mama Dazz made a delightful cranberry sauce (some of which was stevia sweetened for Grandma D and me), sweet potato biscuits (not gluten free, sadly), a large dish of cornbread stuffing (also not gluten free), and three of the four pies I mentioned (pecan, coconut macaroon, sweet potato). I focused my energy on three things: the turkey, stuffing I could eat, and my pumpkin pie.*

Is it worth brining your own turkey and making your own stuffing from start to finish? Yes, my friends, it is. There is something similar to pride to know that you bought your bird from a farmer you know and respect, and seeing how beautiful the end result is to have a perfectly cooked and flavorful turkey. I can safely say I don’t intend on buying turkey from the store in the many holidays to come.

In fact, this reminds me of a funny scene from the show Portlandia, taken from YouTube for your viewing pleasure.


Holiday Bird Brine (Inspired by this recipe)

1 Small yellow onion, coarsely chopped
1 Celery stalk, coarsely chopped
3 Garlic cloves, halved
3 Bay leaves
1 tbsp. Black peppercorns
1 tsp. Yellow mustard seeds
130 g (or 1/2 c.) Sea salt
Filtered water (1 gallon to start the brine, and then enough to submerge your bird)**

Place the ingredients in a large cooking pot and cook on medium heat until steam and slight simmering is visible.
Turn off the heat and let it come to room temperature before doing anything at all with the bird.
Prepare your bird by removing the organs and neck*** and placing it in a very large cooking pot that enables you to completely submerge it in brining liquid.
Carefully pour the brine over the bird and continue to add more water until the brine covers it completely.
Cover the pot and place it in a cold environment (either your refrigerator or a tall cooler with plenty of ice) for a period of 12 – 24 hours.
When finished with brining, remove the excess vegetables and spices from the bird and roast in the oven as usual.****

Makes over 1 gallon of brine.

*Although this year's gluten free pumpkin pie didn’t turn out as I had hoped, the grain-free pie crust was delicious (with enough left over to make another pie with in December). You can find a recipe that did work here.
**The bird we enjoyed weighed around 14 lbs.
***We use the organs and neck to help in creating tasty gravy, and also add it to our stuffing for additional nutrition.
****We didn’t do it this year, but I think cooking the brine along with the carcass would make an excellent stock. Has anyone ever done this before? I’d love to hear how it turned out.

As I said, I made stuffing I was very satisfied with. I wasn’t in a mashed potatoes sort of mood, so at the last minute (and by last minute, I mean three hours before the feast itself) I decided I wanted to make stuffing I could eat. After my not so pleasant experiences my body dealt with going Primal for three weeks, I’ve been eating grains and other sources of carbohydrates at practically every meal. I could have easily made this a grain-free delight, and perhaps for Yule I will, but I was craving cornbread something fierce. The cornbread itself was solely made for the stuffing, so when it came out of the oven it was a tad dry and unappetizing and something I wouldn’t recommend as a finished product. As part of a stuffing, however, I’d say it was the perfect component to a moist yet sturdy spoonful of dressing.

Cornbread Stuffing

For the cornbread:*
240 g Coarse corn flour
1 Large egg
250 ml Filtered water
42 g Butter, melted**

Remaining ingredients:
200 g Pulsed turkey organ and neck meat***
1 Celery stalk, finely chopped
1 Small yellow onion, finely chopped
2 Large eggs, beaten
1 tsp. Sea salt
1/2 tsp. Baking soda
1/2 tsp. Unrefined apple cider vinegar
1/4 tsp. Powdered or rubbed sage
1/4 tsp. Rosemary powder
1/4 tsp. Thyme
1/4 tsp. Cracked pepper
240 ml Filtered water

Preheat the oven to 350°F.
Combine the ingredients in a medium sized bowl and mix until thoroughly combined.
Pour into a greased small cast iron pan and bake for 45 minutes or until done.
Take the pan from the oven and begin cubing the bread with a knife.
With a large spoon or spatula, remove the cubes from the pan and pour them into a large mixing bowl.
Add the remaining ingredients and fold carefully.
Pour the dressing into a 8x8” baking pan and cook for 1 hour and 15 minutes, or until the internal temperature has reached at minimum 165°F.
Remove the pan from the oven and slice or spoon onto the plates
Serve hot.****

Makes 4 – 6 servings.

*If you happen to have cornbread or any gluten free bread on hand, use about 600 g and cut into bite-sized cubes.
**For a dairy free version, replace the butter with your preferred baking oil of choice like olive oil, coconut oil, and various nut/seed oils.
***Should you like to keep this vegetarian or you don’t have organ meat on hand, I’d recommend pulsed walnut/cashew pieces, left over mashed potatoes or pumpkin/sweet potato/butternut squash puree.
****Stuffing is a lot like pizza, in that it’s a great leftover food eaten hot or cold.

Friday, November 2, 2012

Whole Grain Beer Bread

Bread making has always been something I tried to avoid since the creation of this blog. Perhaps it has to do with the notion that there is this goal to make gluten free bread not taste like gluten free bread. 


The breads I do make are few and far between, if only that making loaves of bread somehow gives me this obligation to eat slices of bread every day, and I don’t like being committed to eating the same thing day after day. I’ll even cut a muffin recipe in half or less because of this. I’m just not a bread person.

Scratch that. I’m not a bread eating person. I love the baking part. There’s something about churning the dough/batter with a wooden spoon, watching singular ingredients mesh and collide. You pour it into the pan of your choice and place it in the hot oven, and almost immediately the aromas of baking fill your entire homes. Then comes time to take it out, and the batter has become this completely new creation. Still warm, you slice it or pick one up from its individual crevice, and take a bite.
 
It’s warm going all the way down.

As the days are getting shorter and the air is crisper than it was before the recent weather brought the cold from the Atlantic, words like “warm” and “freshly baked” will be essential to those preparing for winter. Whether it is to be part of dinner to absorb the last remnants of stews or to simply have when traveling out of state on a ten-hour drive, bread can be a beautiful thing indeed.

 My favorite to this day is still the grain-free flatbread recipe I made for the GFRR earlier this year, though it was a hybrid “quick bread” due to my off and on weird relationship with baker’s yeast (though oddly enough, bread making with homemade sourdough doesn’t affect me). I did want to make “yeasty” bread, one that I could put into a loaf pan and eat in thick slices without it falling apart in my hand.   

I also want to clarify that, when I say bread making, I do not mean quick bread or flat bread or even cornbread. Those things I’m all into creating a multitude of recipes. I’m talking about yeasty breads, the ones with only three essential ingredients (flour, water, and yeast/leavening agents), the ones you put into loaf pans to huff and fluff and puff and slice for sandwiches or French toast.


I’ve learned a lot about gluten free bread making through trial and error, such as:
  1. Grinding your own grains with a coffee grinder gives texture and binding.
  2. Even if there isn’t any yeast to the recipe, soak the flour overnight with the liquid you are using. Add the remaining ingredients to the dough right before the baking process.
  3. Combine the two, and you get an amazing bread recipe.

Add beer to it, and you get an AMAZing bread recipe. Gluten free beer, that is.

New Grist is my “drinking beer” of choice (this coming from a person who rarely drinks and drinks little), perhaps because Bard’s bitter hops flavor keeps me from drinking it straight from the bottle. Bard’s is solely a cooking beer for me, perfect for bratwurst in a cast iron pan, equally so in caramelizing onions and cabbage. So when this urge to make beer bread was almost too much to handle, I saw bottles of Bard’s in the pantry and thought “why not?”

Beer. It’s for more than just drinking.

Whole Grain Beer Bread (inspired by these two recipes)

200 g Short grain sweet brown rice
200 g Red quinoa
200 g Corn flour (coarsely ground though not polenta grade and not special arepa flour)
120 CGF rolled oats
2 bottles Bard’s Sorghum Beer
60 g Honey (or maple syrup for a herbivore version)
1 tbsp. Sea salt
1 tsp. Baking soda
1 tsp. Unrefined apple cider vinegar

Measure out the grains (save the corn flour as it is already ground) and use the coffee grinder to make as fine a flour for each grain as possible.*
Pour the flour into a large bowl and thoroughly mix with the beer (it will be a sticky dough).
Add the honey and let it sit overnight.
Combine the remaining ingredients and preheat the oven to 375ºF.
Pour the dough in a large loaf pan** lined with parchment paper, and bake for 1 hour and 15 minutes.
Remove from the oven and let it sit for ten or fifteen minutes, and then use the parchment paper to remove the loaf from the pan to place on a cooling rack (after peeling off the parchment paper) to cool for an addition five or ten.
Slice thinly or thickly to your preference, and serve warm.***

Makes 1 large or 2 small loaves.


*This step will be done in small increments. Some grains will be coarser than others, though it does give wonderful texture.
**Due to a miscalculation of measuring out the flour, I ended up doubling the recipe by accident. This easily makes two smallish loaves, and can most certainly be halved to suit your needs.
***This bread does well in the refrigerator. It remains moist and holds well.

Monday, August 27, 2012

It's Quiet... too Quiet

There are a few things I’ve learned since limiting my daily coffee intake (currently 120 ml, and will be 30 ml less in a week): one, how coffee had pushed my adrenals; two, how much my body had been pushed and for so long; and three, how my body is truly feeling.


Right now, my body is healing from a lot of abuse I didn’t know it had been suffering.

Last week was the last week of camp. 9 1/2 hours working with children each day put teachers in an all-new light of respect in my eyes (especially those in the K – 6 range). All of Saturday was slept, as well as the majority of Sunday. And then there’s today, my first day of school.

Graduate school, that is.

Despite the hectic workweek and literally doing a one-eighty in my life, I still have been playing around in the kitchen. My first jar of fermented veggies (recipe to come later) was devoured, with the second in the fridge (recipe also to come later). There’s homemade nut butter, soaked black beans and rolled oats, whey just waiting for lacto-fermentation, and finally, a jar of  the remaining sourdough starter I had from making pancakes.

“Homemade” has certainly gone up a notch in this household.

Sourdough Buckwheat Bread

120 ml Filtered water
120 g Greek yogurt
240 ml Sourdough starter
200 g Buckwheat flour
1 tsp. Sea salt
1 tsp. Baking soda

Combine the ingredients (except the salt and baking soda) in a mixing bowl and cover to sit at room temperature overnight.
Preheat the oven to 375ºF.
Add the remaining ingredients and let it rest for another 10 minutes (it should bloom slightly).
Pour the batter into a parchment-lined 12 x 16” baking pan* and bake for 30 – 40 minutes.
Remove from the oven and leave to cool for fifteen minutes before serving.

Makes 8 – 16 servings depending on use.

I treated this as “sheet bread”, something to cut into squares and slice in half. It made a delicious sandwich bread option, and it was equally delicious to eat wholly. This recipe would also do well as a skillet bread and flatbread, but monitor the baking time.

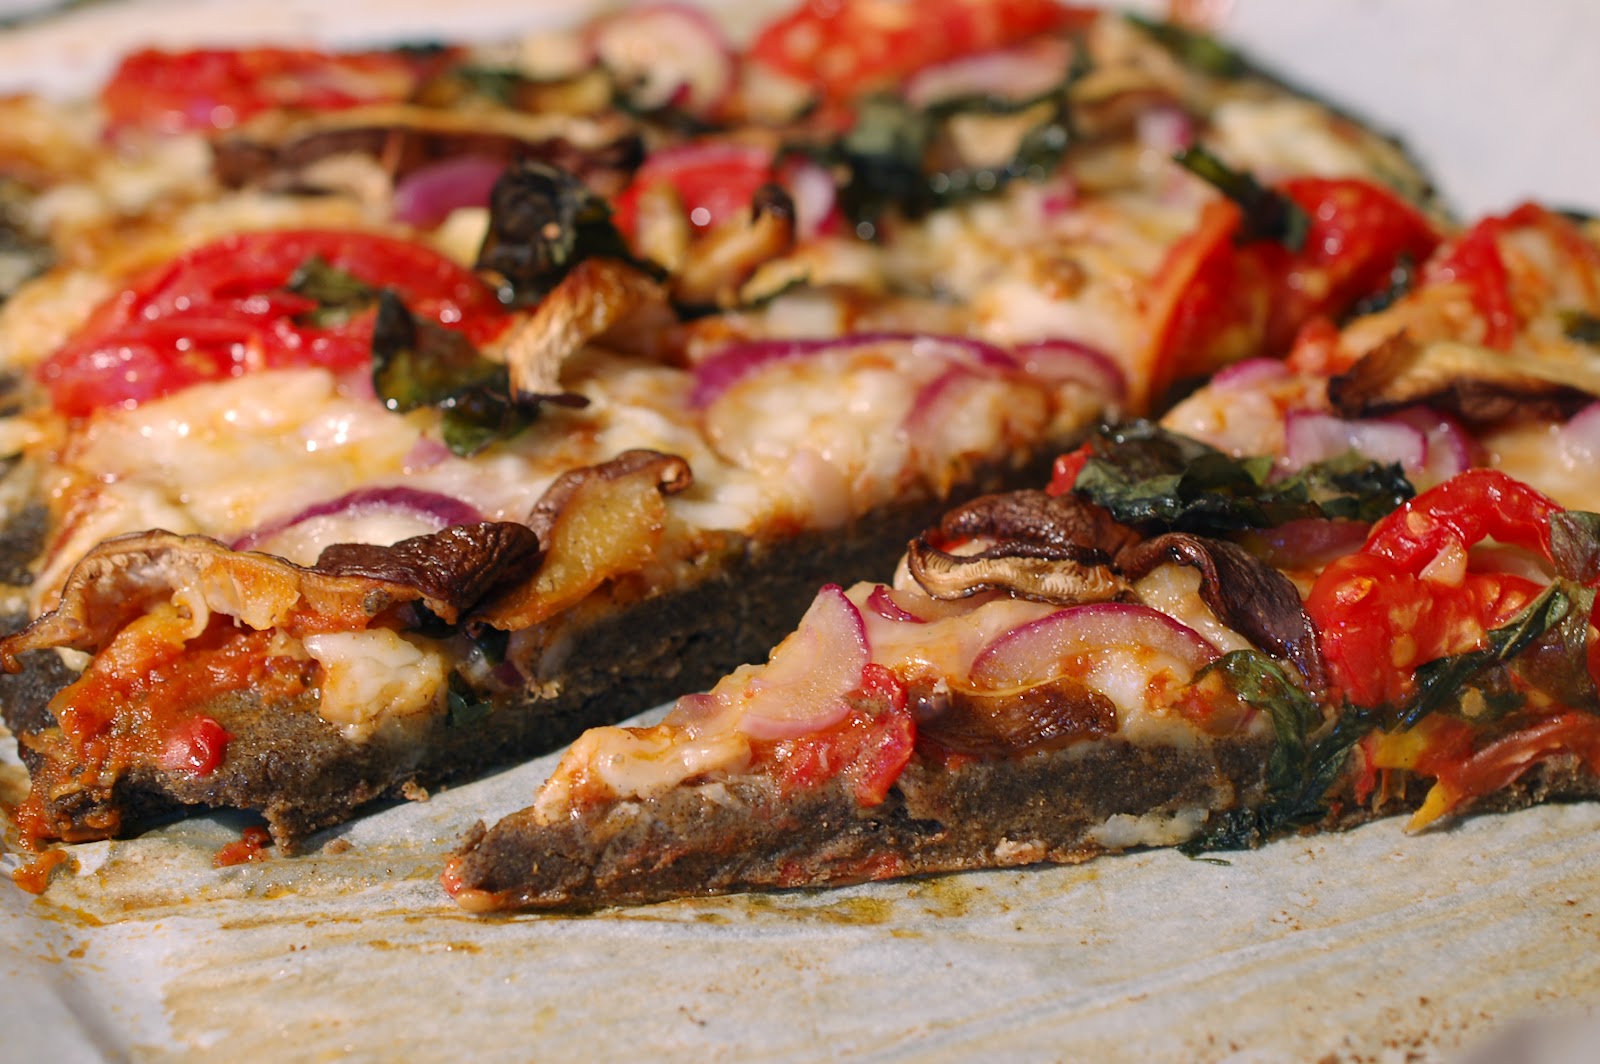
Another thing I made with the starter was pizza. Yes, a sourdough, grain-free and vegan crust with a multitude of veggie toppings. Omit the cheese if you must, but I still think pizza was made for breakfast.

Grain-free Sourdough Veggie Pizza

For the crust:
500 g Sourdough starter
120 g Garbanzo bean flour
14 g Coconut flour
1 tsp. Sea salt

Mix the ingredients and let it sit covered at room temperature for twenty-four hours.

For the toppings:
120 g Pizza sauce*
90 g Parmigiano-Reggiano
Veggies, by preference
15 ml Olive oil

Preheat the oven to 450ºF.
Press the dough onto a 12 x 16” baking sheet lined with parchment paper.
Ladle the sauce in the center and spread thinly, followed by the cheese, the veggies, and sprinkle with olive oil.
Bake for 10 minutes, and then reduce the temperature to 400ºF to bake for an additional 10 – 15 minutes.
Remove from the oven and let it cool for ten minutes before using the parchment paper to carefully transfer the pizza onto the counter for slicing.
Serve hot.

Makes 6 – 8 slices.

* When I went on vacation to Bedford, the family visited the DelGrosso Amusement Park, a place where rides and Italian cuisine unite! The majority of the their sauces are gluten free, but one particular sauce didn't have added sugar or soy. I had to try it out, and it certainly made this pizza yummy!

Wednesday, June 6, 2012

Pass the Bread

Almost any gluten-freer will tell you that they first thing they ever tried baking gluten free was bread. Sometimes they bought a gluten free bread mix, while others attempted to make it themselves. And then, if they were desperate, they bought it from the store.


Don’t misunderstand me; commercial gluten free bread has come a long way since then. Gluten free flours were coarser, made to fill the void of this staple food rather than make something substantial. The bread loaves were dense, only edible when toasted. There were times I recall taking a bite and found myself needing a glass of water just to swallow. And let us not forget the creativity in which ingredients were combined. In most cases, we see a higher percentage of starch in place of wholegrain flours, or multiple gums and a higher sugar content to make it moist and palatable (though the use of all three in moderation is perfectly fine). Everywhere I looked, gluten free bread were simply fillers for an otherwise breadless lifestyle as I knew it, with chemically things I couldn't even pronounce.

I didn’t want fillers. I wanted substance. I wanted bread: minimal ingredients for a good slice of deliciousness.

Toasted and ready for dippin'!

I will be honest, however, when I say that gluten free bread is different… you know, besides the gluten free part. Gluten free grains have been used to make bread for thousands of years before gf became a lifestyle, such as the cornbreads of the Americas and injera in North Africa. Gluten free flours milled from buckwheat, rice, hemp, nuts, seeds, and sorghum have been used alongside wheat, barley, and rye for just as long. The reason why gluteny grains were so popular in the first place was the gluten protein that enabled bread to rise, to be sturdy and soft at the same time, and its reaction to yeast.

Here’s the thing, though: you don’t need gluten for a good piece of bread, as the participants of this month’s Gluten Free Ratio Rally will tell you. It takes effort, yes, and definitely experimenting with different flour combinations and additional ingredients, but it is possible to enjoy gluten free bread with wholesome ingredients made at home.

For my entry, I had this idea to make a grain free loaf with sun-dried tomatoes and basil. I used the ratio of five parts flour to three parts water and tried Jim Lahey’s no-knead method for a hearty loaf. And I got a hearty loaf all right. A few hundred more and I could have made quite an eco-friendly brick wall that would intoxicate many a bird or squirrel.

So I strayed away from my first idea and thought what went wrong. Clearly it was missing something, and I definitely needed to use a certain amount of yeast for a certain amount of time. Two bread flops later, I found what had been missing (eggs) and realized something about yeast.

Yeast and I have a finicky relationship. I love how it is alive before the baking process, how it completely changes a loaf of bread and the almost tinny taste it provides. It is a beautiful ingredient, both for baked goods and brewing. But as I said before, sometimes we just don’t get along.

Savory French Toast

So I hope the GFRR can forgive me for making a hybrid, as I used eggs and leavening agents synonymous to quick bread making, though it does not contain fat or dairy in the dough. And you know what? My entry is quite an amazing flatbread, and I will happily tell you why.

This bread is highly adaptable. I’ve toasted it, dipped it in chili, eaten it straight from the refrigerator, and made savory French toast. It is the perfect component for an open or closed face sandwich, and ever so tasty with a smear of soft cheese or nut butter and honey. Have it for any meal or just when you want a quick snack on the go. But believe me when I tell you, this is a great bread to have on hand.

And it didn’t need gluten (or yeast) to be delicious.


No-knead Sun Dried Tomato and Basil Flatbread

200 g Garbanzo bean flour
200 g Quinoa flour*
95 g Blanched almond flour
2 tsp. Sea salt
480 ml Lukewarm to hot water (a little on the hotter side)
2 Large eggs (about 125 g), lightly beaten
2 tsp. Baking soda
10 ml Unrefined apple cider vinegar
85 g Sun dried tomatoes
5 g Dried basil
1/2 tsp. Rosemary powder
Olive oil, for greasing the pan

In a large mixing bowl, combine the flours and salt with the water and let it sit on the counter until lukewarm.
Preheat the oven to 400ºF.
Stir in the eggs and the leavening agents and leave the dough to rise for ten to fifteen minutes (this dough will look and act much like a thick batter).
Fold in the tomatoes and spices, and then pour into a 12 x 16 cookie sheet coated in olive oil (if you’re worried about sticking, line it with parchment paper and use the olive oil as flavor), and cook for 25 to 30 minutes until browned.
Let it cool for fifteen minutes, and then slice into 16 squares for your enjoyment.
For later use, place in a plastic bag and put it in the refrigerator or freezer.

Makes 16 slices, or 8 – 16 servings.

*I ground whole grain quinoa in a spice grinder and had a medium-coarse "polenta" consistency (hence the slightly hotter than lukewarm water). But finely ground quinoa flour would work just as deliciously.

Karen of Cooking Gluten Free was our generous host for this month’s challenge. What I love most about her (and her awesome site) is this very true statement in her About Page: "Through all the years that I have been a part of the gluten free world, I am continually impressed with the giving nature of every person that has started a business to help the gluten intolerant." She personifies her “gluten free, giving back” philosophy, as I believe all of the GFRR participants strive to do with their blogs, businesses, cookbooks, and recipes.

So thank you, Karen, for paying it forward.

Here are the beautiful bread entries from this month’s challenge (all of which look AMAZING):

Adina | Gluten Free Travelette  Seedy Sandwich Bread
Angela | Angela’s Kitchen  Our Family’s Basic Gluten Free Dairy Free Bread
Aunt Mae (aka ~Mrs. R) | Honey From Flinty Rocks  Chia Millet Bread
Brooke | B & the boy!  Buckwheat-Oat Bread
Charissa | Zest Bakery  Cherry Pecan Pot Bread, Gluten Free 
Claire | This Gluten-Free Life  German Vollkornbrot (Seeded Bread)
Erin | The Sensitive Epicure English Sandwich Bread (gluten-free & egg-free)  
Jenn | Jenn Cuisine  Gluten Free Boule
Jonathan | The Canary Files Gluten-Free, Vegan Mediterranean Soda Bread
*Karen | Cooking Gluten Free!  Gluten Free Sandwich Bread/Gluten Free Naan
Meaghan | The Wicked Good Vegan  Vegan Gluten-Free Bread
Meg | Gluten-Free Boulangerie  Ciabatta (gluten-free, egg-free/vegan)
Monika | Chew on This!  amaranth skillet flatbreads, amaranth mini pita rounds
Morri | Meals with Morri No Knead Sun-dried Tomato & Basil Flatbread (yeast free/grain free)
Pete & Kelli | No Gluten, No Problem  Gluten-Free Challah
Rachel | The Crispy Cook  Gluten Free Chickpea Sandwich Bread
TR | No One Likes Crumbley Cookies  Gluten Free White Bread
Tara | A Baking Life  Gluten-Free Sandwich Bread & Boule

Wednesday, April 18, 2012

Well Enough to Cook

Even after a few days of recovery, writing has proven itself difficult. It has nothing to do with the physical ability; typing isn’t rock science. Regardless, even after a week of doing absolutely nothing, these few sentences are hard to put into words.


Maybe the muck monster was offended that I put its offspring with the vegan muffin in such a negative light. Maybe it was just a matter of time that my self-fulfilling prophecy of my crashing led to my... well, crashing. Maybe it was a lot of factors that formed into the infection that my parents contemplated sending me to the ER for.

I was bedridden because of a sinus infection. Yes, I know how ridiculous that sounds. I thought a sinus infection meant a sniffle and a runny nose, maybe take a day off from work and exercise, and then I'd be right as rain a day or two later. This wasn’t your typical sinus infection, though. It was the debilitating kind. The kind that started off like a minor case of springtime allergies and slowly progressed into something terrible. By the Easter weekend, I had lost my ability to smell and taste, and my Easter weekend “Hot Crossed Buns” recipe left me in a slump because I couldn’t tell if it was a winner or not. I developed such a tremendous toothache I thought my upper right wisdom tooth was growing in. (The sinuses had gotten so inflamed they started applying pressure to my jaw, giving me the worst toothache imaginable.)

These tasted better than they looked, I swear.

By the following Monday, I went with the community center to the Natural History Museum, and it was a miracle I could stay upright. My nose was red. My eyes were bruised. My head was spinning. My patience was limited. Sadly, this was only the beginning.

I was able to get an appointment with an ears and throat specialist on Wednesday, and I was in such bad shape I couldn’t even drive myself to his office or drop off (and pick up) the medicine he prescribed. I entered the waiting room with my frontal, sphenoid, and ethmoid sinuses so swollen, the pressure turning me into a sobbing mess. For days I was crying because it hurt so badly, and the Neti Pot only provided temporary relief. The skin around my eyes was purple, and my face looked like I had gotten into a fight… and lost.

After I had gotten the medication to treat it, I had to deal with the side effects of the prescriptions. Thankfully the mental stuff went away in twenty-four hours, but I was emotionally sensitive to everything for days. I found myself angry with people for no fault of theirs, and crying when they made a joke or said something in the attempt to be lighthearted. I was weak and fatigued and felt terrible about myself for not blogging or exercising. I couldn’t stand for longer than a few minutes before becoming winded and dizzy. Sunlight physically hurt, and I’d lost all sense of a constant body temperature.

It has been over a week, and I’m finally able to write, to go to work, and (hopefully) exercise by the weekend. I was able to make dinner the past few nights, and my restlessness to go out into the world has been seen as progress in the most positive and obnoxious way. 

I peeled AND deveined them myself! First time too.
Fluffy Pancakes, mango chunks, and df banana-almond butter syrup

But being sick does gives you time to reflect, whether you want to or not. There’s not much else you can do when you’re bedridden. There were moments where I was really down and feeling sorry for myself. I was upset that I was sick and in pain, yes, but I was more upset with what I couldn’t do. I couldn’t do yoga, run, rock climb, or go outside. I couldn’t blog or cook or take pictures. I could feel all of my hard work these last few months of getting in shape melting away as I ate and slept and not much else. I could feel my body getting softer, my stomach getting rounder, and my arms weighing me down.

I tried doing the little things to keep me active (i.e., clean my room, laundry, doing dishes, going up and down the stairs), but the inability to stand for more than a minute and feeling so crappy nipped that idea in the bud. On a positive note, I noticed the amount of food I ate was similar to the amount I consumed while exercising, the only difference being that I actually felt satiated and didn’t wake up hungry. I now have a baseline of what I can eat when I am sedentary, a foundation to build up the necessary nutrition for when I’m active.

As I said, being sick gave me time to reflect and observe the present. I’m not feeling sorry for myself anymore, and the things I want to do for the world don’t seem impossible.

Bangin’ Banana Bread

120 g Quinoa flour
120 g Garbanzo bean flour
80 g Unsweetened applesauce, room temperature
40 g Honey
1/2 – 1 tsp. Sea salt
1 tsp. Baking soda
1 tsp. Cream of tartar
120 ml Almond milk (unsweetened vanilla), room temperature
 2 Large eggs, room temperature
120 g Unsalted butter, melted
1 1/2 – 2 Ripe bananas, mashed  

Preheat the oven to 350ºF.
Combine the flours, leavening agents, and salt in a mixing bowl.
In a quart measuring cup, blend together the applesauce, honey, almond milk, and eggs until you have a smooth consistency.
With a hand mixer or a whisk, add the wet ingredients to the dry until just combined, and then slowly pour the butter until all has been added.
Fold in the mashed bananas (if you don’t want clumps, I suggest blending it with the wet ingredients and stirring until smooth) and pour the batter into a greased loaf pan.
Bake for 50 minutes, or until the blade of a pairing knife inserted in the center come out clean.
Let it cool in the loaf pan for 15 minutes before popping it out onto a cooling rack.

Makes 1 loaf, or 12 thick slices. Remains soft in the refrigerator, and is ideal at any temperature. 

Tuesday, March 20, 2012

Considering

There was a moment in between applying for various volunteer and intern positions this morning where I considered my favorite kinds of foods. 


Morri considering food, you say to yourself, is nothing new

I know.

Morri thinks about food all the time, you continue, whether it is recipes, cookbooks, philosophy, or future endeavors regarding the restaurant business or a non-profit organization. 

I know.

It’s nothing new, you conclude. 

I know.

So on this rainy morning, while considering the option to replace today’s running with Monday’s workout, I take a breather before resuming another search on idealist.org, and flashback to a conversation I had with Mama Dazz.

Photos of Community Gardening, 2009

I have a taste for the simple and the holistic, and that shows through the meals I make. Stews, one-pot wonders, and bowlfuls of everything-but-the-kitchen sink are my area of expertise. I yearn for comfort, for days of leftovers, and for food sources that don’t drain your bank account. These are the recipes that I enjoy sharing, and they are the ones I am the most proud of.

But I want to take it a step further, to show people the significant difference food from the backyard garden can make in a recipe, and to learn how to be a leader in the movement toward sustainable development in the community. I want to document all of the wonderful contributions being made by the unsung heroes of the movement, and I want to be part of it, either as a volunteer, a post-graduate intern, or having a decision-making position in the cause.

Mushroom picking in Sweden, 2010

I’m tired of waiting around for the world to give me heading; it’s time I got my hands in the soil and did something to change the way people look at food. I have to be the change I wish to see in the world, and it's time I prove it.

As mentioned before, I have a penchant for bubbling stews and soups on the stove, filling the house with enticing aromas and warmth only a well-used kitchen provides. There is one soup that I am always in the mood for, and I needed to work with what I had.

Onion soup is an amazing kind of recipe. I searched for different kinds of onion soup, but the French version is the most popular, if not the only one out there. It has everything one could ever ask for in the attempt to using up whatever is lying around: onions, leftover beef stock, stale bread, and cheese you haven’t used up yet. It is a stick-to-your-ribs kind of soup, rich and dense, with essentially all of the main food groups provided. So to no offense of the French, since I have the privilege of knowing quite a few amazing people from the country, I made my own kind of onion soup, something lighter and with a homemade chicken stock base. What’s so marvelous about this recipe is that you essentially have two meals: the onion soup and the chicken and veggies for another day. (You can also place the meats and veggies from the stock at the bottom for additional nutrition.) I made skillet cornbread, modifying the ingredients but otherwise made the same way as I usually do.


Onion Soup in a Homemade Chicken Broth

For the Homemade Chicken Broth:
2 qt. Water
30 ml Unrefined apple cider vinegar
450 g Chicken thigh meat*
6 Garlic cloves, whole
85 g Leeks, coarsely sliced
4 (156 g) Carrots, whole
2 (76 g) Celery hearts (preferably the innermost hearts**), whole

Combine all of the ingredients in a pressure cooker or large pot on medium-high heat until the meat and vegetables have softened (to the point of falling apart) and the liquid has colored slightly.
Remove the chicken and vegetables and set the broth aside.

For the Onion Soup:

Homemade chicken broth, recipe above
1 Bay leaf
2 tsp. Sea salt
1 tsp. Cracked pepper
30 ml Coconut oil
3 White onions, halved and thinly sliced horizontally
3 Red onions, halved and thinly sliced horizontally

Gouda cheese, finely grated as garnish

In a large flat-bottomed skillet pan or pot on medium-low heat, melt the coconut oil and cook the onions until translucent and caramelized (be careful not to burn).
Transfer the onions to the broth and add the remaining ingredients, cooking on medium heat for thirty minutes to and hour (I let it simmer while preparing the cornbread).
Pour the soup in up to six bowls, garnish with the desire amount of Gouda cheese, and serve hot with a side of cornbread***.

Yields 6 servings.

*This is what I had on hand, but you are welcome to use whatever parts of the chicken (or any meat) are accessible to you.
**You can use whichever part of the celery, but the innermost heart stalks are the ones I noticed people don’t eat raw, and thus perfect to use in soups.

***Goat milk Cornbread

240 g Masa flour
1 tsp. Baking soda
1/2 tsp. Sea salt
240 ml Water
240 ml Goat milk
2 Large eggs
42 g (3 tbsp.) butter
50 g Unsweetened applesauce

For instructions, click here.

Makes 1 batch and 8 servings.

Monday, March 19, 2012

Fitness Progression & Bread Rising

This has been quite an interesting albeit exhausting day, and I’d thought I’d share a few things before I went to bed. Besides successfully baking a "dark" version of Irish Soda Bread, I have also modified my fitness regimen. Running and rock climbing each three times a week has really brought a positive change in my physique. When the boyfriend visited over the weekend, he (and others) couldn’t help but notice my legs getting firmer. When we went rock climbing with his brother at the SportRock in Sterling, I successfully completed trails higher up and harder than the ones in Alexandria, trails I’d never climbed before.

At some point, however, I felt that something was missing in my routine, but I couldn’t figure out what it was. I mean, I had the upper-body workout with the bouldering and the aerobic/lower-body work out with running, so what else was there? For many months, Cheryl had been asking whether or not I’d considered yoga, mostly for stress relief but also for days I didn’t feel like running or rock climbing. Mama Dazz was also flabbergasted by my hesitation, because I took Kundalini Yoga in college and loved it. After four days of yoga at least once a day (each only being a couple of minutes long), I’ve noticed significant change in my arm strength, my balance, my breathing, and my focus. Even better, my dear readers, is that I’m sleeping and sleeping well.


(source)

After adding yoga, my stress level has decreased and I’m not randomly hungry throughout the day. And when I do eat, I don’t have the desire to continue eating after I am full. I can now look at remnants on a plate and save it for a later time. It’s only been four days, but I’m rather happy with the progress I am making.


Now, about the recipe.

On Saturday I attempted to make Irish soda bread for that night’s family hullabaloo, but impatience and uncertainty got the better of me and I took it out too soon. Part of it had not finished baking and it fell apart. This is one of the few recipes I actually used a mix (part of it was King Arthur’s all-purpose gf flour mix and another was a various combinations of flours I pre-made), but I thought the taste was that of soda bread. And a note to all of you if you don’t have buttermilk or yogurt on hand, goat milk works very well for it.


Determined, I decided to try a different recipe for Irish soda bread from Williams-Sonoma's Cooking at Home (2010, p. 430), one of my go-to cookbooks these days. I was inspired to make the “dark” or brown version of Irish soda bread, something with a molasses color and flavor. Naturally, I looked to teff and I was ecstatic of its success.

This bread can be made the night before, but if you are going from fridge to the oven, you need to add ten minutes on your cooking time (I found it easier to mold it in the desired shape, plus lightly carve a small cross on top for ultimate leavening… and to let “little people” out). If not, simply baking it at 425ºF for 30 - 35 minutes as the cookbook recommends. Also, this is the halved version of the recipe, and it still turned out wonderfully. To double, add an additional gram to the oats (45 g), flaxseed meal (15 g), and yogurt (375 g).

Brown Irish Soda Bread

180 g Teff flour
22 g CGF rolled oats
7 g Flaxseed meal
3/4 tsp. Baking soda
1/2 tsp. Sea salt
30 g Unsalted butter, chilled
187 g Greek yogurt, full fat

Preheat the oven to 425ºF.
In a food processor, pulse the teff flour, oats, flaxseed meal, baking soda, and salt until just combine.
Cut the butter into eight pieces and scatter throughout the dry ingredients.
Press the “pulse” button again ten consecutive times until the mixture resembles a coarse meal.
Add the yogurt and blend the ingredients as evenly as possible, until it forms a ball.
Chill covered up to thirty minutes or overnight, and then turn out the dough with your floured hands onto the baking sheet lined with parchment paper you intend on using. (The dough should be soft to the touch).
Flatten the ball into a 7-inch dome and, using a sharp knife, cut a shallow “X” from one side of the loaf to the other.
Bake 25 – 30 minutes, or until there is no give on the crust in the center.
Transfer the loaf to a wire rack to cool slightly, then serve warm.

Makes 1 loaf. Serves 4.

Tuesday, February 28, 2012

Going [Pea]Nuts for Bread

Bread is something of a rarity for me. I think it has more to do with the perceived obligation of eating it for days after baking it. Gluten free bread can, if made a certain way, i.e., incorrectly, go from a warm slice to pair with chili to a crusty brick in a matter of twenty-four hours or less. That happens less frequently now, what with my love of experimenting with ingredients. I’ve been working with different flours, learning about their individual flavors and textures, incorporating different liquids, leaveners, binders, fruits, vegetables, fats, etc. 

From my persistence for a perfect slice, I’ve made skillet cornbread and apple teff bread, both using applesauce for moisture. In many other cases, egg and flaxseed meal have acted as binders so it doesn’t crumble apart in your hand.

The one I'm going to talk about didn't crumble, mumble, or bumble. And I want to share its awesomeness with you.


I don’t really make bread often, maybe once a month at most. I like to keep it “whole grain”, or not using starches when I can. But when I find a new innovative way to making bread, I like to try it and see what I think.

There has been uproar (the good kind) far and wide on the creation of Mr. Peanut Sandwich Bread. Lisa of the 24/7 Low Carb Diner made it for her son who was eating the GAPS diet. Even those who eat a low carb diet miss the taste of a good sandwich, particularly the bread part that makes a sandwich... well, a sandwich. A brilliant way of making bread is using finely ground nuts/seeds or nut/seed butter.


Who would have thought peanut butter made sandwich bread that sliced easily and tasted so darn good! The result was a springy and sturdy loaf, still soft after refrigeration, and delicious as is for as an alternative for breakfasts with a smear of fruit preservatives or cream cheese.

To take it one step further, I added poppy seeds for my own personal spin on the recipe. And when I perfect making my own nut/seed butters, I’m going to try making this bread with almond, cashew, pistachio, walnut, pecan, sunflower seed, pepitas, and flaxseed. Maybe an additional flavor or two…

Peanut Butter Poppy Sandwich Bread

256 g Smooth peanut butter*, organic and lightly salted preferred
3 Eggs
1 tbsp. Unrefined apple cider vinegar
1/2 tsp. Baking soda
1/4 tsp. Sea salt (or more if the peanut butter is unsalted)
20 g Poppy seeds
Stevia or honey, to taste (optional)
Coconut oil, for greasing the loaf pan

Preheat the oven to 350ºF.
Grease the loaf pan with coconut oil at room temperature or cooking spray and set aside.
Blend the peanut butter, eggs, and vinegar with an electric beater on medium speed until smooth.
Stir in the remaining ingredients thoroughly, especially in regards to integrating the poppy seeds.
Pour into the greased loaf pan and smooth the top.
Bake for 30 – 35 minutes.
When done, carefully remove from the loaf pan onto a cooling rack.
After a few minutes, it can be sliced and served.

Makes 1 loaf, 16 slices. Refrigerates beautifully.

*Allergic to peanuts? If you can tolerate almonds, Lisa recently made her Mr. Peanut Sandwich Bread with almond butter just as successfully. And if you made it with the other nuts and seeds I've listed above, I'd love to hear how it went.

Tuesday, January 17, 2012

Change, Growth, and Skillet Cornbread

It seems like the transformation occurred overnight. Along with my feeling better from that two-week flu, I’ve seen a complete change in my perspective. I feel like a new person, a new Morri who is taking life into her own hands, and daring to fly. 

Change has always been a scary thing for me, and for a while I avoided any form of it that would bring positive growth simply because I was afraid to fail. I was living quietly, for I didn’t wish to cause ripples, and I didn’t wish to disappoint. I felt I was and was not living to others expectations at the same time, and I suffered as a result. I was waking up at 4:30 a.m. on five to six hours of sleep, restless and tired of the constant chatter in my head. I had no desire to blog or go out with people, even though I have had plenty of time to do both, and became absorbed with Sherlock Holmes. There was a loss of connection with the world around me, stagnation in my relationships with the people who mattered most, and insecure with how I fit into it all.

After my various heart-to-hearts with the boyfriend, Mama Dazz, and myself intrapersonally, I realize I have been doing an injustice to myself. At one point this weekend, I remember the chatter being particularly critical and unpleasant, and in the darkness of my bedroom I realized just how unproductive it really was. Instead of griping about things I could indeed fix, that energy could be used to do something about it. It was my first of many “Well, duh!” moments these past few days, but it altered a lot of my thinking in the right direction. 

And yet here I was, treating my own self as the enemy, as someone who couldn’t be trusted. If I wouldn’t dream of treating others like that, being overly critical and judgmental with how they live their lives, why the hell am I doing it… to myself?  This question lifted my post-graduation funk, just as the New Year shows itself to be an enlightening one.
 
My other enlightenment takes the form of a new philosophy: when there is something to do, do something; when there is nothing to do, do nothing. I’ve found that the reason behind a person’s boredom and restlessness is that you’re doing nothing when you should be doing something. Mental exhaustion and physical strain, on the other hand, is the result of doing something other than doing nothing. When it comes time to doing nothing, you shouldn’t be thinking of the things you would have to do later. Doing nothing can be anything that relaxes you or brings you peace, so as long as you don’t tire yourself out with them. I dare you to try it out, because you will never be bored and/or exhausted again. Better yet, you will feel like an entirely new person.

This new attitude has given me a new confidence, a new fitness regimen, and I am actually getting things done. My room is getting cleaner by the day, and the house is setting itself back into order. I ran this morning, all bundled up in an early January rain, and I feel so free of all the static and prattle that once plagued me. I’m still getting up earlier than I would prefer at 5:45 a.m., but I’m sleeping an hour more than I had been recently. Much of it has to do with a firmer pillow, but I like to think it has more to do with my new outlook on life than anything.

So, even though I’m working two jobs part-time, and I do have obligations to uphold, I’m not going to live a life of mediocrity anymore or settle for good enough. If I’m going to work and exercise and blog, I’m going to do the best I can. And if I’m going to rest and meditate and love, I’m going to give the time doing nothing deserves. Above all else, the fear of failure and success shows itself in many forms, from cooking to expectations to how high you aim to go.

To quote two people who've inspired me for many years:

 “It is sometimes a mistake to climb; it is always a mistake never even to make the attempt. If you do not climb, you will not fall. This is true. But is it that bad to fail, that hard to fall?” (N. Gaiman, from The Sandman: Fables and Reflections)

“You must be the change you want to see in the world.” (M. Gandhi)

You may be asking, what does this have anything to do with cooking or health? Well, it has everything to do with it. If you only stick to the things you know how to cook and are good at making, you will never learn but you will never fail either. As for change, I’ve learned to treat my body (and thus, life in general) as one big experiment. The food you eat and the life you live is forever changing. It is a push and pull movement, a dance that never ends, sometimes obvious and sometimes not.

I have every intention of succeeding, no matter how it may be defined and no matter how scary it is. It took numerous times of failing to getting cornbread right, but that didn’t keep me from trying.

If I can make a perfect cornbread recipe, I can do anything.


Cornbread is one of those foods that can be finicky at the best of times. The cornbread I remember as kid was out of a box, a Jiffy box if I’m not mistaken. For some reason, my homemade recipes were grainy, dry, and not too appetizing. I tried using various flours with different grain sizes of cornmeal. I tried incorporating applesauce, using milk in place for water, and different kinds of fats. As the Southern states have made cornbread without any other flours for years and years, I was at a loss as to what I was doing wrong. My goal was a dense Southern cornbread in comparison to the cakelike Northern counterpart, with a good crust which only came from a hot skillet, and a final product that held up to stews and sauces.
Masa harina was the answer.

I was successful in making the recipe the two times I made it, the first with buttermilk and the second with lassi (drinking yogurt), though I am sure regular milk will work here also. The recipe I am posting is from the second batch, since the former was accidentally erased (note to self: always write a recipe down on paper). Both were moist and dense, the perfect basic skillet cornbread. I do intend on playing around with additional ingredients and flours, but this is just delicious as is with a slab of butter and a drizzle of honey on top.

For future reference, dear readers, all recipes will be measured in grams from now on in the name of precision, though teaspoons and tablespoons will be listed as they always have been. 

Basic Skillet Cornbread

240 g Masa harina (also called maseca)
2 1/2 tsp. Baking powder
1/2 – 3/4 tsp. Sea salt (if using lassi, put in less salt)
240 ml Water
240 ml Lassi (or buttermilk)
2 Eggs
1 tbsp. (21 g) Honey (15 g was in the first batch)
3 tbsp. Butter

Preheat the oven to 425ºF, and place an 8 – 10” iron skillet in the middle.
Combine the masa harina, baking powder, and salt in a large mixing bowl and mix thoroughly.
In a separate bowl, beat the eggs in with the liquids (including the honey but not the butter), and then pour it onto the dry ingredients.
Blend with a wooden spoon until a wet dough forms (the baking powder will make it rise and give it an airy texture), and let it sit for a few minutes.
Take the skillet out of the preheated oven and melt the butter to coat the bottom and edges of the pan.
Drizzle the remaining butter into the dough to combine, and then pour the dough into the skillet (to evenly distribute the dough and smooth the top, use a medium-sized silicone spatula).
Lightly cover the top of the pan with aluminum foil and bake for 45 minutes.
After 45 minutes, remove the foil and bake for an additional 15 minutes.
Take out of the oven and let it sit for a few minutes, though it’s recommended to be served warm.
Serve with butter and honey, or as an island in the middle of a huge bowl of chili or stew.

Makes 8 servings.