Showing posts with label creative mind. Show all posts

Sunday, July 12, 2015

Eating Cake on the Rooftop

On at least three separate occasions I have been asked if I’m still doing Meals with Morri. The short answer is yes. The longer answer obviously has more to it than that. 


When I first started, I was cooking and posting and writing on the regular, and in doing so I learned how to cook and post and write. I met a lot of talented and amazing people along the way. Companies and publishers reached out to me to write reviews for their products and cookbook authors. I learned to be picky, and when to say no.

But with the evolution of Meals with Morri, particularly the person behind it (i.e., yours truly), I started to become very critical of my art. If it wasn’t something I thought people wouldn’t like, it wasn’t posted. If the photos I took were not good enough, the recipe itself would have to wait. This doesn’t particularly bother me, because I have really blossomed with the food I’ve made, and the stories I’ve written about them have refined. The problem I am facing now is the realization as to why I love to cook, and why Meals with Morri has been lacking in recipes per month recently.

My motivation in making food is just that: making food. Not for me, but to share with others. Eating the same food with other people is such an important ritual for me. It’s a sacred act of connecting with others at the table. I had experienced a similar revelation while I was in Malta. When I lived alone, I just made food. There was nothing more to it than insuring I was eating enough. But when CK and I visited each other or I made food for the office, suddenly the creative juices were flowing in overdrive. And perhaps the underlying reason is to validate my art, to see that Meals with Morri was doing something positive in person. But really, I’ve come to realize that, like my previous aspirations to be a chef, I really love it when people eat and enjoy the food I make for them. 


Living with my parents after over a year of not doing so has meant that what they eat and what I eat doesn’t mesh as often as it used to when it was my responsibility to make dinner for the family. There’s nothing wrong with this, of course, but not sharing food I make with other people has affected my motivation to create and share recipes online. I like there being a reason for my art, and I want to experience that shared moment in person, in real time. CK and our two dear friends H and J have risen to the challenge in helping me see that it's equally important for me to enjoy my art, and are more than willing to help give me ideas in what to make (thanks, guys).

Last night, I was invited to a friend’s birthday party, and although I wasn’t asked, I made a cake that I knew I’d be able to eat. It was a rooftop party, one that overlooked other Washington, D.C. apartments and offices, the Washington Monument blinking lazily far away. The already present cupcakes had been eaten, and to my surprise, my cake was used to sing to him “Happy Birthday” (which I unashamedly conspired with his girlfriend in making happen). The cake was said to be quite good, and only a few people knew that it was gluten free. 

Rooftop Carrot Cake with Honey Sweetened Cream Cheese Frosting

For the cake
120 g White rice flour*
1/2 tsp. Baking soda**
1 tsp. Cream of tartar**
1/4 tsp. sea salt
1 tsp. cinnamon
2 eggs
1 tsp. Vanilla extract
150 ml olive oil
200 g coconut sugar
5 Carrots, grated

Preheat the oven to 350°F, and grease (I used butter) and flour (I used the white rice flour) one 9-inch pan.
In a medium bowl, sift together the rice flour, baking soda, cream of tartar, sea salt and cinnamon.
In the bowl of a stand mixer (or a larger bowl with a hand mixer), combine the eggs, olive oil, coconut sugar, and vanilla, and beat on medium-low speed until the mixture is slightly frothy.
Reduce the speed to low, and add the flour mixture in small increments, making sure to scrape down the sides of the bowl with a rubber spatula each time.
Stir in the grated carrots, mixing until combined, and pour the batter into the prepared baking pan.
Bake for 40 - 50 minutes, or until a toothpick inserted into the center of the cake comes out clean (for me, this was 50 minutes).
Let the cake cool in the pan for 10 minutes, and then turn out onto a parchment lined wire rack to cool completely.
Once cooled, decorate the cake with frosting and other toppings you may enjoy (such as unsweetened coconut shavings).

Makes 1 cake, or 12 slices.

For the frosting (courtesy of this recipe)
8 oz package or 240 g Cream cheese, softened
56 g Unsalted butter, softened
85 g Honey
Unsweetened coconut shavings, as topping (optional)

Whip the cream cheese in a standing mixer until soft, then add the butter and honey to blend.
Mix on medium speed until smooth and creamy.
Makes 12 – 18 servings.

* NOT to be confused with sweet rice flour. If you do, you’ll get a mochi-like consistency.
** The baking powder equivalent is 1 1/2 tsp.

Saturday, August 2, 2014

Break

Friday was the start of my Break. For the first time in quite a while, I will have a month without work obligations. And with school over and done with, I feel like I can breathe.


CK met me a few months before I started graduate school, and we began dating just after my first semester. It occurred to me that he didn’t know how Meals with Morri used to be, how often I used to be in the kitchen creating things. But with graduate school, working, and trying to be active, Meals with Morri went from being an eight or more posts a month phenomenon to maybe one or two.

But last night, after my walk from work, and a number of feral kitties demanding attention and petting along the way, we celebrated the best way we knew how: homemade food and a movie.


First attempt at cauliflower crust pizza, adapting from this recipe.
We ended up using coconut instead of almond, which changed the texture a bit, but still yummy.

Finishing graduate school has been a little anti-climactic for me. It brought a lot of nostalgia and fear of the unknown with it. It brought the realization of how exhausted and frustrated I was. It brought sadness that I really haven’t celebrated finishing, and missing the chance to walk with peers I actually knew because I was abroad. But being abroad also brought experience with how NGOs work, and also getting to spend over two months with a person I love. I was able to spend the summer doing what I set out to do; now it’s a matter of figuring out the next step (or three) of achieving my goals in finding a job and living with my man by 2015. A tall order, but hey, it’s worth it.

The other thing I noticed too was how my energy level and mental stamina increased significantly once I had turned in my last assignment of my last graduate course in early July. At the time, I was too tired to really think up of recipes, but I did completely change the Meals with Morri set-up. I created separate pages for recipe categories, and recreated the overall look of the site. At the moment, I’m working towards linking my creative outlet in recipe making and sharing to what I want to do with a career: combining the conflict analysis and resolution discipline with farmers’ rights and sustainability issues.

August will be the month of really learning how to use my camera to its peak potential, and really enjoying my break with CK in Rome. I have many ideas for future recipes, and what and how I want to continue sharing my as well as other people’s stories through food.

Living in the Mediterranean has been like a pleasant wake-up call to food quality and freshness. In the United States, things like mozzarella cheese and balsamic vinegar are ‘meh’ at best. I’ve seen artisanal mozzarella products sold at farmers markets, but it wasn’t until CK insisted I try one during his visit in December that really changed my mind about this cheese.

To be fair, they do sell the cheap-o kind in the markets, usually in plastic bags with whey for one euro each. And they’re okay. But the stuff you want to get is usually found in the cheese section, and by sight alone you can see how the quality differs. When I first tried it, I experienced something of cheese nirvana. The balls are typically slightly firm on the outside, but when you cut into them, the softness runs onto the cutting board like the yolk of a sunny side up egg. And the taste, goodness me, the taste of these things is not the mild, almost tasteless mozzarella I’ve been having for the majority of my life. Oh, no. This taste is more pungent, salty, with a sour, fermented finish. It melts in your mouth, and you can’t help but savor the work that went into making something of such high quality.

Enter balsamic vinegar. In the United States, what we think of balsamic vinegar is essentially wine vinegar with grape must and caramel coloring. It was my favorite growing up. But when CK took his parents and me to Eataly (a store that resembles the love-child of Whole Foods and Ikea), we were able to taste something a little closer to the real thing. I was blown away by how thick the vinegar was, how flavorful it was, and the depth of those flavors. It was rich and sweet, but not overtly or cloyingly so, and it is the most divine pairing to mozzarella. To be fair, the vinegar we tasted wasn’t what I’d call the Holy Grail of Balsamic Vinegar, but I found that it was just a step below it, and likely the best to find without going to Modena and searching for a finished batch of what ends up being a twelve-year aging process.

Nonetheless, both ingredients made undoubtedly a delicious Insalata Caprese for two, and it was nice to be so mindful and engaged in making what ended up being a wonderful lunch to celebrate break.

Insalata Caprese for Two

2 Large handfuls of Rocket (also known as Arugula)
2 Buffalo Mozzarella balls
1 Large tomato
16 Fresh Basil leaves
2 tsp. Balsamic vinegar*

On two large plates, place an equal amount of rocket in the center of both.
Slice the tomato in half, and into thin strips horizontally, to lie onto the rocket.**
Slice the mozzarella similarly, and place on top of the tomato.**
Add the basil leaves on top, followed by a light drizzle of balsamic vinegar.
Serve immediately, chilled, either as a dish to a multiple course meal, or by itself.

Makes 2 Servings.

*You really don’t need a lot of balsamic vinegar, just enough to splash a little flavoring here and there.
** I did mine a little more artfully. I used a circular biscuit cutter and layered the tomato, cheese, and basil in that to maintain shape.

Thursday, February 13, 2014

Gnocchi: Making Messes and Getting Creative

For the past couple of months, I have struggled with recipe rut. Either the recipes don’t turn out like I had hoped, or it just didn’t taste post-worthy. I am also dealing with wanting to do so much. Along with a full workweek at the NGO, I’m also doing six credits worth of work this semester for school. Hoping to make use of my free time more efficiently, I had this optimistic hope that I could cook, photograph, write, sew, draw, paint, exercise, sing, dance, and travel in my free time. I wanted to work on enhancing my skills in all of these simultaneously. I wanted to devote equal amount of time all of my creative outlets.

And then reality set in. I couldn’t do it all and still hold on to my sanity. In an effort to better myself to such extreme measures, without down time or people I cared about, I would be talented… but not a better person. I've had great advice from friends when I needed suggestions in making time for my passions: 

"Preferably mix the ones most compatible and develop them together (such as art and writing). If it can't be managed, stick with the one you love most and rotate the others."

"Combine them. Works the best for me. Although my hobbies are different, they mostly go hand in hand."

Worse still, I started to see the struggle CK goes through when he talks about making food as a chore. It isn’t as fun when you aren’t making it with or for other people. After the two Maltese dishes I made, I was left with tons of leftovers. It became monotonous and boring to eat the same thing day after day. Food really does taste better with other people to enjoy it with. The ambience and the company are equally important to eating as the food itself.
"Where love sets the table food tastes at its best."
- French Proverb

Making gnocchi, for example, just doesn't taste the same unless you're making a mess with another person.

When CK visited in December, we made gnocchi for the first time. Without a potato ricer, they turned out tasting like mashed potato pillows, but still good sautéed in butter with spinach and cheese. And when he visited again at the end of January, he surprised me with a potato ricer, and it made all the difference.

Trial 1: Delicious, but dense and mashed potatoey

And before you tsk tsk with the concept of getting a potato ricer because it is considered a single use kitchen appliance and will likely gather dust in your cabinet next to your fondue pot, think again! I've used it to make lump-free mashed sweet potato and squeezed excess water from shredded zucchini for nutrient-laden pancakes. I am also in the works to making gluten free spätzle and single serving apple sauce with it. (So there...)

Gnocchi is by far my favorite pasta to make from scratch. There is no expectation to have a perfect shape, although the smaller the pieces the firmer they are after boiling. While initially bland in flavor, they transform a dish to something filled with comfort and warmth. Making and preparing gnocchi takes longer (and creates such a satisfying mess) than it does to cook it. I find my favorite way of making a recipe with gnocchi is cooking them and then using them to make a casserole of sorts with bubbling sauce and cheese. If you ever need a dish that promotes a borderline meditative state in making and eating, gnocchi is for you.

I followed the instructions Heidi of 101 Cookbooks wrote in her post “How to Make Gnocchi like an Italian Grandmother recipe”, and I found that the Maltese Derby worked quite well. And even better, I used my favorite flour (garbanzo bean/chickpea/besan) and turned it into a grain-free delight!

This is a dish to make with your sweetie on any date night you have coming up. It is also a great way to get your family and friends in on the fun of making a true blue homemade meal. In the midst of counters to scrub and flour to wipe off every surface, it’s certainly worth the mess.

Grain-free Gnocchi (inspired by Heidi’s recipe)

2 lbs Potatoes*
1 Large (50 g) Egg
120 g Garbanzo bean flour
Sea salt
Dried spices, optional**

Place the potatoes (washed) in a large pot and pour the water so it covers at least a couple of inches above. (Note: depending on their size, it may be a good idea to cut them in half. Since the Maltese Derby is medium-sized to small, I didn’t need to.)
Salt the water (a teaspoon or two will do), and bring to a boil until potatoes are tender, roughly 45 minutes depending on the potatoes’ respective sizes.
Remove the potatoes from the water one at a time with a slotted spoon, but save the potato water.
Place each potato on a large cutting board and peel it as soon as possible before moving on to the next potato (without burning yourself, mind. I find keeping a small bowl of cold water works wonders. Heidi recommends using a paring knife).***
While hot, push the potatoes through the ricer to create very light fluffy potato piles. (I found the potato ricer really does help in making quality gnocchi. It’s worth the buy.)
Let the potatoes cool spread out across the cutting board for roughly fifteen minutes, or long enough so that the egg won't cook when it is incorporated into the potatoes.
When ready, pull the potatoes into a soft mound, drizzle with the beaten egg and sprinkle 3/4 of the flour across the top.
With a spatula, scrape underneath and fold, scrape and fold until the mixture is a light crumble and add the remaining flour (a little at a time) until the dough is moist but not tacky, almost billowy.
Cut it into 8 pieces, and gently roll each piece of dough into a snake-shaped log, roughly the thickness of your thumb.
Use a knife to cut pieces every 3/4-inch/2 cm.
Shape the gnocchi by holding a fork in one hand and placing a gnocchi piece against the tines of the fork, cut ends out.
Use your thumb and press in and down the length of the fork, and the gnocchi should curl into a slight "C" shape as their backs capture the impression of the tines as tiny ridges (great for sauce).
Set each piece of gnocchi aside until you are ready to boil them.
Reheat your potato water or start with a fresh pot (salted), and bring to a boil.
Cook the gnocchi in batches by dropping them into the boiling water roughly twenty at a time (I’ve been able to do up to thirty or forty, but was conscious of where I dropped them into the water. I also found it easier to do so if they went in one at a time).
Once they are done, they will pop back up to the top.
Fish them out of the water a few at a time with a slotted spoon ten seconds or so**** after they've surfaced.
Place them in another bowl, either with sauce to serve immediately or in a pile to be used for later (they’ve yet to stick when I just place them on top of each other as I prepare to put them in the oven).
Continue cooking in batches until all the gnocchi are done.
Serve hot with sauce, pesto, or cheese.

Makes 3 – 6 Servings, depending on meal size or appetite.

* Heidi recommended using Russet potatoes because of their starch content. I found that the MDP also worked well, despite it’s texture being waxy and wet.
** Gnocchi by itself can be a little bland, so adding some dried spices like basil, oregano, or thyme to the dough will enhance the flavor. I would love to add nutmeg next time.
*** CK wanted me to mention "that after boiling long enough, the skin should slough off with a bit of pressure. It let me peel the potatoes quickly."
**** Depending on the size of the pieces or the flour you are using, you may find that ten seconds just isn’t enough time. My rule of thumb is to wait twenty seconds AFTER the entire batch (1/8 of the dough) has plopped to the surface.

Tuesday, October 23, 2012

New Priorities

As I worked to finish my midterm by the deadline, another week between posts went by. The realization of no longer having a plan still lingers in the back of my mind, but a new realization has taken its place for introspection.

That is, I’m going through the process of deciding what my priorities are. 

Tell me, has your Mara come to Tea lately?

This can be an ever-consuming venture, as I’m the sort of person with a plethora of big dreams, seemingly bigger than my life can permit simultaneously. To an extent, my dreams are too large to manifest themselves at the same time in the here and now, but I still dream and want and need.

The Burt-man, being ever observant in my turbulent changes these last few months, provided me with his Pennsylvanian Dutch wisdom the best he could (Dad figures tend to do that). He told me that life was like a chessboard and I was chess piece on that board. As a singular chess piece, I only have a certain number of options of squares to which I can move to, and each piece on the board plays the game differently. You play the game with the options you have, and work with the strategies to move from square to square to ultimately assist in best playing the current game.

In where I ultimately plan to be, I cannot move through life thinking “if only I had so-and-so’s life” or “why is it easier for so-and-so to do this or be that.” They’re just a different chess piece in a different game.

I bring this up because I still struggle with wanting to do everything and do it right the first time. I want[ed] to be a full-time graduate student with a full-time job of my dreams (with benefits), live on my own, heal whatever is conflicting my body, become amazingly fit as I excel at rock climbing, weight lifting, running, and yoga, blog beautiful posts and recipes five times a week, have an active social life and time for a significant other, learn the cello, sing jazz, travel often, have daily enlightening meditations and philosophical realizations… 

And this all had to happen at the same time in the course of a year or I viewed myself a failure to all Morri-kind.

I still want to do and be all these things, and I am confident that at the right time and place I will. It’s a matter of priorities, of deciding what move on the chessboard you position yourself first.

Not surprisingly, the personal growth my blog has nourished has become a top priority. This isn’t about the site itself, but more what it had manifested: self-awareness, confidence, the evolution of my passions, and a focus of my creativity. And though I have a few of the things I want to do in life underway (part-time graduate school, part-time work, part-time social life, working to become awesomely fit and healing holistically), fueling and nurturing my creative outlet has taken center stage.


For one, that means taking photography seriously and actually understanding why I produce the photos I take, and how to make them more professional looking. It also means taking the recipes to a higher standard.

Here goes everything.

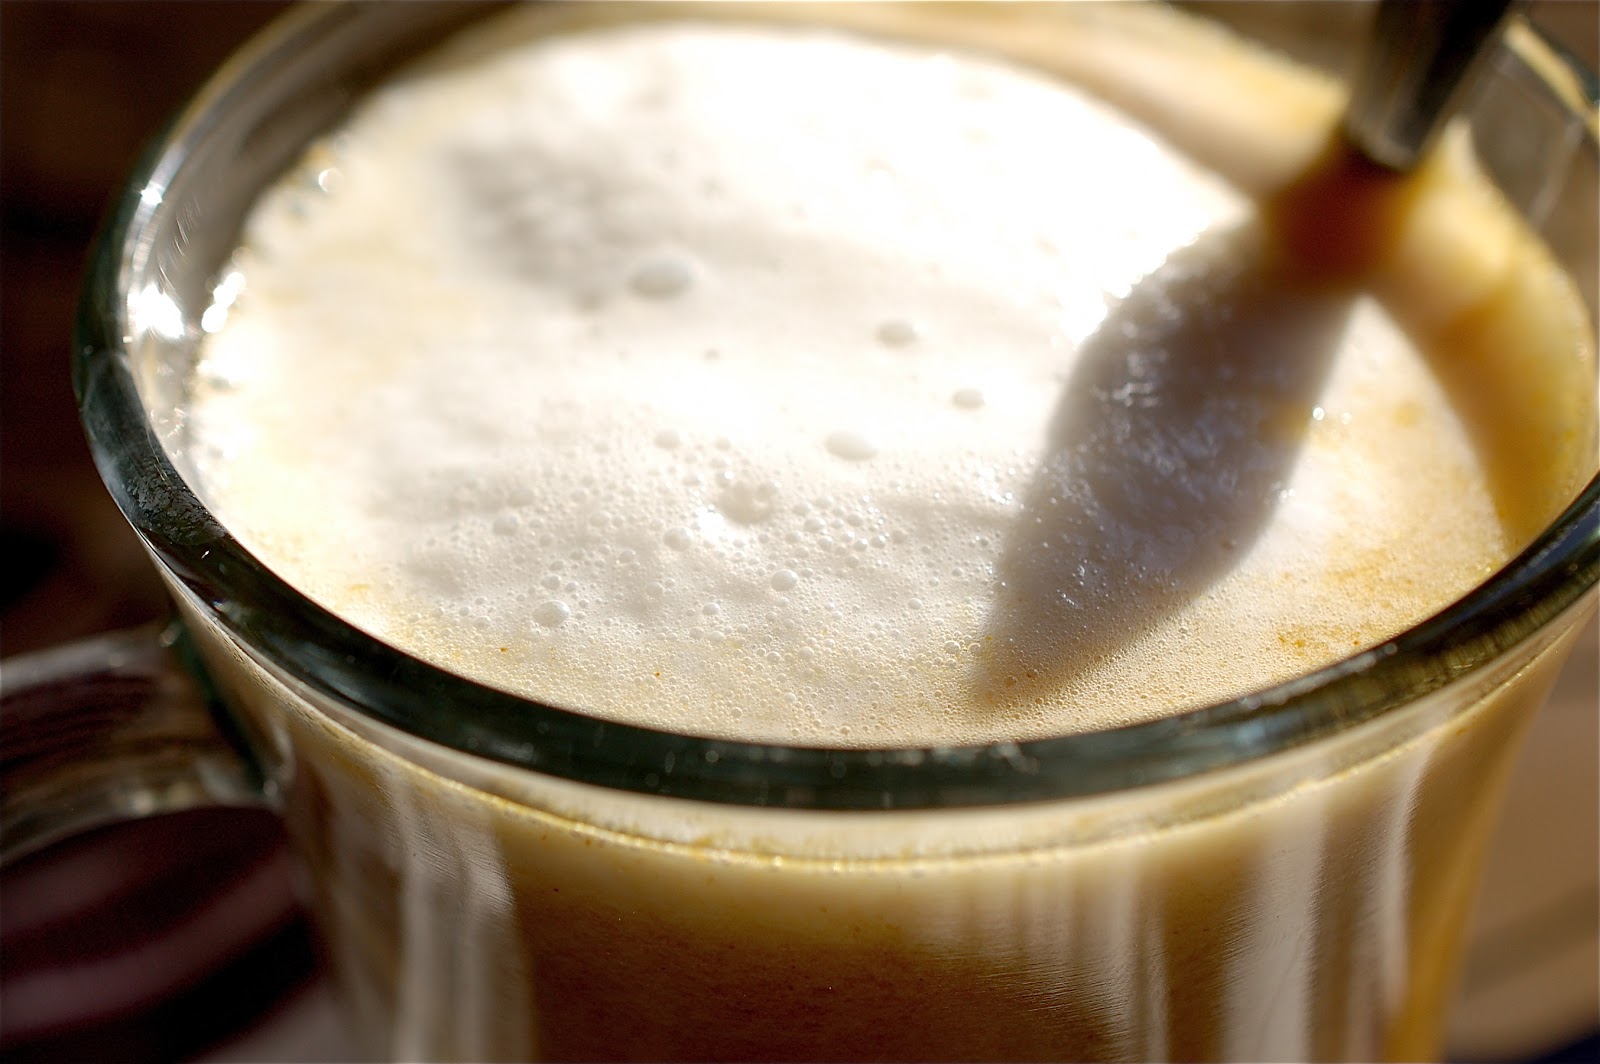
Pumpkin Chai Latte

480 ml Filtered water
2 Chai tea bags (or loose tea equivalent)*
120 g Pumpkin puree
1/4 tsp. Cinnamon
1/4 tsp. Nutmeg, plus a dash as garnish
1/4 tsp. Allspice
1/4 tsp. Coriander
1/2 – 1 tsp. Unrefined apple cider vinegar, optional **
Sweetener, to taste ***
120 ml Almond milk (or whatever “milk” you prefer)

In a medium saucepan, cook the water on high heat until it simmers, and add the tea bags to steep for three to five minutes.
Remove the tea bags and lower the heat to medium-low, and add the remaining ingredients save for the almond milk.
Pour the chai tea into two mugs and set aside.****
In a separate cup, froth the almond milk with an immersion blender, milk frother, or simply put in a lidded jar and shake rigorously.  
Pour the milk on top of the tea and garnish with nutmeg.
Serve hot.

Makes 2 servings.

*I used Trader Joe’s Rooibos Chai Tea
**When I was sick this time last year, the old boyfriend put apple cider vinegar in my rooibos tea and it tasted like a tangy hot apple cider. He had read somewhere that it helped with sore throats and the overall feelings of crumminess.
*** I used honey, about one tablespoon per serving. (I get such a sweet tooth for my tea as it gets colder.) But this can be easily made herbivore using maple syrup, stevia, coconut sugar, date sugar, or left unsweetened.
****The pumpkin puree has a tendency to separate and sink to the bottom. Simply stir until you add the almond milk.

Tuesday, October 2, 2012

Playing with Paleo: A Delicious Birthday Experiment

The autumn storms have rolled in and brought with them that crisp air I love so much. Pumpkin and apples are in ample supply, and baking is becoming a coming occurrence in my household. With my Masters application officially submitted, I’ve exhaled this breath I had apparently been holding. Along with other hard lessons digesting from September, October is looking to be one creative and relaxed sort of month (save for midterms, of course).

The best part of fall is the flavor selection. We have foods that warm and fill us, sweet and savory ingredients that come together in a symphony of delights, and the oven always seems to be preheated and ready to go. To add to that, fall is the season I become very adventurous in my recipes.
 
Over the weekend I celebrated my two best friends’ birthdays. J and TJ, a ridiculously adorable couple, have been so supportive and loving as I pieced together what had been causing my recent stress, and visiting them (individually and together) always lightens my heart and brightens my day.

What was left of the piñata...

So when I was approached with the challenge to make a Paleo dessert for TJ, a lover of pumpkin and cheesecake, my Creative Mind’s gears starting turning.

In place of cream cheese and butter, because TJ is lactose intolerant, I looked for ways to make turn raw, dehydrated coconut flakes into “cheese” with a creamy nut butter consistency. (How did I do it? Read on for the link in the directions.) For the crust, almond meal and coconut oil was used to make it grain-free and dairy-free, and it had a marvelous crushed graham cracker taste and consistency.

 It was a delicious experiment, and one that will only get better over time. As for TJ and J?

They loved it.

Paleo Pumpkin Birthday "Cheese"cake

For the crust:
240 g Almond meal
64 g Honey
1/2 tsp. Cinnamon
120 g Coconut oil, melted

For the filling:
500 g Homemade coconut “butter”
425 g Pumpkin puree
3 Large eggs
400 g Honey
Juice of 1 Lemon
1 tsp. Bourbon vanilla extract
1/2 tsp. Cinnamon
1/4 tsp. Nutmeg
1/4 tsp. Ginger
Sea salt, to taste (optional)

Preheat the oven to 350ºF.
In a medium bowl, combine the almond meal, honey, cinnamon, and melted coconut oil. (If a little wet, add a little more almond meal until it is soft but stable to the touch.)
Press the mixture throughout a greased 9-inch pie pan until evenly covered, and then set aside.
If you do not have homemade coconut butter on hand, proceed to Chocolate Covered Katie’s blog to learn how to make your own, and then add it to the remaining ingredients for the filling in another medium bowl to mix.
Pour the filling in the center of the pie pan and spread it evenly.
Cover the crust with aluminum foil to prevent burning and bake at the center of the oven for one hour.
Remove from the oven and let it sit for 2 – 4 hours until room temperature and then let chill in the fridge for an additional 2 – 4 hours or overnight before serving.
Serve cold.

Makes 8 – 16 servings.

Thursday, September 6, 2012

A Little Bit of Philosophy in Sun Butter

Before you read any further, I must ask that you pay no attention to the background of the photos. The blurred, artistically cropped things of food surrounding the sun butter are not important right now. What is important is that little glob of sunshine smeared on the still-warm dish. The littlest things in life, at least for me this week, are the most significant.

Thus, sun butter.


Sun butter is that holy grail of spread that took me so long to find and create to my liking. I didn’t want sun butter (or sunflower seed butter, but I like its abbreviation better) that had additional oils or sweeteners, and I didn’t particularly care if it wasn’t raw. I wanted something that stuck to the roof of my mouth just like any nut butter and taste what it really was: sunflower seeds.

There are a lot of great recipes out there for sun butter, though I find in my search through cyber space a twisted hope that I don’t find it. If you go on an adventure to find something and come back empty-handed, that is where your creativity, ambition, and strength to make do come out to the light. So what if you don’t get exactly what you wanted? Sometimes getting what you want is the last thing you need. Sometimes you do get what you want and realize it wasn’t what you were hoping for. Sometimes it just takes a little more effort to get there, perhaps with more twists and turns along the way.

Sun butter has become the focus of my philosophical “aha!” moment this morning. Here is this dollop of brown gloop just sitting there at the center of whatever I happen to put it on, and I get lost in its significance. 


I’m learning to break things down into manageable blocs of focus throughout the day. There’s time reserved for meditation, for studying, for classes, and for my part-time job. There’s time reserved for blogging, for eating, for exercising, and other things. From my week enjoying a spoonful of the sunny stuff I learned to not stress over being perfect the first time around (case in point, the delicious “flop” food the sun butter is so delicately placed on), and to not micro-manage everything. Just because I’m managing my time is no reason to become too time oriented and rigid. There’s stuff going on between the studying and the classes, the blogging and the meditating, little stuff that cements those blocs into the collective whole that is my life in a day. Life happens and there will be bumps and bruises and tears amidst the smiles and smooth sailing. That’s just a small part, the majority of which being rather amazing and awe-inspiring.

In conclusion, my dear readers, the little dollops of sun butter are just the minute experiences that make the whole dish of life that much better. So go ahead and take a spoonful. Just remember that there are other meals to taste along the road.

A Little Bit of Sunshine Roasted Sun Butter

330 g Raw sunflower seeds
1/2 tsp. Sea salt

Preheat the oven to 300ºF.
Spread the sunflower seeds flatly on a large baking sheet lined with parchment paper.
Roast for 30 - 35 minutes*, until golden brown and aromatic, stirring 1 to 2 times.
Remove and add to your food processor, scraping down the sides as necessary.
Process for 10 - 12 minutes, continuing to scrape as needed.** 
Once it is smooth, add the sea salt and process for another minute or so until it is at the desired consistency.

Makes 10 servings.

* Sunflower seeds take a little longer to brown, but I assure you the “roasted” taste in the sun butter is worth it.
** Okay, sun butter takes quite a while to become, well, sun butter. For a time it will seem like all it’s becoming a sunflower seed flower, but then it will ball up and have the consistency of sticky dough. The ball will twirl around the processor and then it will flatten out and finally liquefy. (But is it worth it, Morri? you ask. Yes, yes it is.)

Wednesday, July 4, 2012

Learning from Kids and their Art

When you work with kids, you start seeing things in a brand new perspective. You start seeing how amazing the world is, how fascinating the creative mind works, and just how brilliant sentience can be. The kids I work with range from going into kindergarten all the way to entering middle school, and all of the artwork they’ve created thus far is simply too beautiful for words. 


In the working environment I find myself in this summer, with its amazing staff and equally amazing kids, I come home so energized and inspired to make the next day even more spectacular. They’re bringing out the best in me as I hope I do the same in leaving a positive mark in their lives.


As I work with these kids, it is phenomenal how effortless being yourself actually is. They keep me on my toes, sure, because each child needs something different from me, but I strive for that sort of life. Whether it’s how I teach, what art project I have them do for the day, or working with what kind of day they’re having, I feel limitless in my abilities to be that person for them.

If it is one thing I’ve learned so far, it’s this: if there are no mistakes in a child’s artwork, then there are no mistakes in my own growth and progression. Why should my inner critic talk so loudly over something that can only get better over time? If I find children’s art so amazing – with their perceptions of reality shown in shaky albeit heavy marker lines, large words and figures out of proportion – and their imagination so incredibly infinite in their tiny finite bodies, then I should realize how far I’ve come and far I’m going.


To celebrate my first forty-hour workweek in my life, I made a cake. It’s a sticky, moist, apple cake that tastes amazing warm from the oven to sitting in the fridge for a few days. It isn’t too sweet, but life is sweet while you eat it.
“While we try to teach our children all about life,
Our children teach us what life is all about.”

~ Angela Schwindt 

Sticky Apple Cake

240 ml Sparkling water
2 Large eggs, yolks and whites separated
60 g Unsweetened applesauce
42 g Honey
1 Apple (I used a Pink Lady, but whatever you have is fine), grated
1/2 tsp. Bourbon vanilla extract
120 g Buckwheat flour
90 g Mesquite flour
30 g Blanched almond flour
1 tsp. Baking soda
1 tsp. Sea salt
1 tsp. Cinnamon
1 tsp. Ground ginger
1/2 tsp. Nutmeg
80 g Apple butter
Walnuts, optional

Preheat the oven to 350ºF.
In a medium-sized bowl, blend together the sparkling water, egg yolks, applesauce, honey, grated apple, and vanilla, and set aside.
In another bowl, mix the flours, spices, and leavening agent thoroughly before integrating the wet ingredients with the dry.
With a hand blender or a whisk, form the egg whites into stiff peaks and gently fold them in with the batter.
Pour the mixture into a greased (I used coconut oil to keep it dairy-free) 9-inch pie pan.
Using a small silicon spatula, place the apple butter on the top and form a swirl indentation to create a marbled appearance.
Bake for 45 minutes or until the center is thoroughly cooked through.
Remove from the oven and let it cool for fifteen minutes on the counter before cutting into the cake and serving.
Smear your choice of nut butter, creamed cheese, or whipped cream, and serve warm or chilled with coffee, ice cream, or whatever you’re in the mood for.

Makes 1 cake, or 8 servings.

Wednesday, June 1, 2011

Draft Cider, Saffron, & Chive Gourgères

Maybe it has to do with not having anything to occupy my thoughts aside from what is going on at home day to day, but I’ve been considering my holistic lifestyle as of late. Meaning, I wondered how I came to be gluten free, a standard of living that led to other variants of food-related health I follow. Just how did I end up becoming gluten free? Why was it so easy to follow? Could I, rather, would I ever go back to the “White Bread Diet”?


My Creative Mind is quite the philosopher when it wants to be.

Let us consider the WBD for a moment, if you please. As a kid, I was quite the picky eater. I didn’t like pancakes doused in syrup or breads with visible seeds or grains. I didn’t like runny egg yolks, or eggs for that matter. I didn’t like the texture of oranges or tomatoes. I wasn’t a fan of rice. The majority of seafood was off limits. And don’t get me started on vegetables. Much of my focus was anything I could put in a sandwich or on top of a dinner roll or pasta. 

First time making them. They were slightly larger, and without the saffron.

The WBD also goes hand in hand with Adding White Sugar To Everything. When I was sick, and I often was, with terrible migraines and a tender stomach, sodas such as Ginger Ale or Coca Cola dulled the pain. Nasty tasting medicine tinctures were served with Breyers vanilla ice cream just so I would eat it without nausea forcing it back up again. There was a time I actually put white sugar on top of fruits for sweetness, when fruit juices were not 100%, when Slim Fast was an okay breakfast for all, and when high fructose corn syrup what the sweetener of choice.

It’s apparent that we’ve come a long way since then.

The WBD is the inhibitor diet, the diet that keeps you from truly tasting the wonders of the gastronomic universe. It keeps you in this tiny box where a particular cuisine or food type reigns supreme, where going out to an ethnic restaurant only to eat what you know you like is an adventure of epic proportions.

Out of necessity, this so-called restrictive lifestyle known as GF has broadened my palate and eating spectrum. It was a gateway lifestyle to a happy Morri, a healthy Morri that started to realize the infinite possibilities of her “limitations.” When I cut out refined sugars and pre-made gluten free products of old (Before the Lärabar, the Gluten Free Mall, and So Delicious Coconut Chocolate Ice Cream), I started to see exactly what I had been missing. I started making things from scratch, and developing a knack for it. I began craving for vegetables the eight-year-old me (heck, even the sixteen-year-old me) would have never eaten, or enjoyed eating them. The science and magic behind food and making recipes were always a mystery in my world BGF (before gluten free), and now I’m making things that most people feel they have to buy because they are so hard to make at home. 


The Gluten Free Ratio Rally (hosted by the amazing Erin of The Sensitive Epicure) has revolutionized gluten free baking since its beginnings earlier this year. It brings a number of wonderful people to make something of the same type with their own personal twist added to it. If you have a ratio for a particular food that you are familiar with, say pancakes or muffins or scones, you can use whatever ingredients you have on hand and make a remarkable dish. At the same time, if you are given a ratio to a food that you are unfamiliar with that up until now was a recipe left to the professionals in the culinary world, it is no longer impossible. It’s a challenge.

Before May of this year, I never thought I could make a pâte à choux recipe, even BGF. This eggy pastry dough can be made into savory starters or dessert delights, ranging from gnocchi and gourgère to churros and éclairs. It can be stuffed with soft fillings or topped with ganache or served by its delicious lonesome. It can be steamed, baked, boiled, and fried. This is the pastry of all pastries, one that is all elegance and not as hard to make as one would think, gluten free or not.


Draft Cider, Saffron, & Chive Gourgères

8 oz Newton’s Folly Authentic Draft Cider
4 oz Butter
1 oz Glutinous rice flour
1 oz Rice flour
1 oz Millet flour
1 oz Tapioca starch
8 oz Egg (around 5 eggs, with egg white removed)
1/4 tsp. Sea salt
1/4 tsp. Saffron threads
1/3 c. (0.5 oz) Finely grated Parmesan-Reggiano
1/3 c. (1 oz) Finely grated Gruyère
0.25 oz (1/4 c.) Chives, thinly chopped

Preheat the oven to 425°F.
In medium-sized pot, bring the hard cider, butter, saffron, and salt to a simmer over a high heat.
Reduce the heat to medium, add the flour, and stir rapidly with a wooden spoon. (The flour will absorb the liquid quickly and a dough will form and pull away from the sides.)
Keep stirring to continue cooking the flour and cook off the liquid, about a minute or so.
Remove your pan from the heat and let it cool for a few minutes, when you are able to touch the dough for an extended period but it is still warm to hot.
Add the eggs one at a time, stirring rapidly until each is combined into a paste.
Stir in the grated cheeses and chive after the eggs have been incorporated.
On a parchment-lined or greased baking sheet, pipe or spoon out golf ball-sized portions (I used an icing bag for this).
Place the gourgères in the middle of the oven for ten minutes, then reduce the heat to 350°F to complete the cooking, about 10 – 15 minutes longer.
Taste or cut into one to judge the doneness of the pastries.
Before serving, you can fill the puffs with a soft cheese or a savory mousse.

Makes 24 – 28 gourgères. Can be served immediately or stored up to 48 hours in the fridge.

And don't forget to check out what the other lovely members of the Rally did with the pâte à choux ratio:

Amanda of Gluten Free Maui | Earl Grey Cream Puffs  
Amie of The Healthy Apple | Pate Choux with Creamy Macadamia Icing     
Britt of GF in the City | Pâte à Choux
Caleigh of Gluten Free[k] | Savoury Paris-Brest
Caneel of Mama Me Gluten Free | Key Lime Cream Puffs
Charissa of Zest Bakery | Choux Shine: Koshi-an Filled Cream Puffs
Claire of Gluten Freedom |  Chocolate Eclairs
(Our amazing host!) Erin of The Sensitive Epicure | Gluten free gougeres filled with herbed goat cheese mousse | Churros y Chocolate Sin Gluten
Gretchen of kumquat | Cheddar Gougères with Dates and Pine Nuts | A Danish Puff
Irvin of Eat the Love | White Cheddar Gourgères stuffed with Porcini and Shallot Goat Cheese
Jenn of Jenn Cuisine | Gruyère & Herbed Gougères
Lisa of Gluten Free Canteen | Cracked Pepper & Cheese Gougères
Mary Fran of Frannycakes | Marillenknodel with ginger and cardamom sugar & chai cream puffs
Meaghan of The Wicked Good Vegan | Cardamom and Rose Water Cream Puffs (with Rad Whip!)            
Meg of Gluten-Free Boulangerie | Chouquettes   
Pete & Kelli of No Gluten, No Problem | Almond Choux Florentines
Rachel of The Crispy Cook | Cream Puffs Filled with Coffee Cream
Robyn of Chocswirl | Gruyere & Parmesan Gougeres with Sage & Thyme   
Sea of Book of Yum | Rose Vanilla Cream Puffs and Vanilla Eclairs
Silvana of Silvana's Kitchen | Gluten-Free Spinach Gnocchi Parm
T.R.of No One Likes Crumbley Cookies | Beignets
Tara of A Baking Life | Parmesan & Black Pepper Gougères | Frangipane Puffs

Friday, May 27, 2011

The Creative Mind & Philly Cheesesteak Stuffed Green Peppers

I’ve always believed a Creative Mind is a terrible thing to waste. A good friend of mine asked me, after recently sampling a few of my meals, how I was able to come up with my recipes. I was rather baffled by the question, because it never occurred to me that making up recipes as I cooked them was anything special. Sometimes, they turned out amazing. And sometimes… well, not so much.


The Creative Mind is a wondrous entity. It’s that little voice in your head that gives you an image, a word, a recipe, an equation, a feeling, or all of the above. For cooking, it may tell you that a combination of flavors or ingredients may or may not work, encouraging you to go out of your comfort zone. If it didn’t turn out as you expected and/or wanted, this voice will not criticize or yell. Rather, it may say what could be done differently the next time and to try it again. It turns flops into learning experiences. It turns the process of making a meal into an adventure. It turns the meal into a cornucopia of insight.

I find it interesting how my week of R & R was my Creative Mind’s time to producing one amazing recipe after another in my mind’s eye, resulting in meals I never considered until I made them. Most of the recipes I didn’t even take photos of, though I did write them down for future reference. My Creative Mind shined through this week, and more often than not I was in the kitchen, making a mess or two.

For a moment I feared that cooking was replacing my other artistic loves, partially because it has been years since I’ve written poetry on a regular basis or drew more than a sketch in a college notebook. The only thing I’ve really photographed lately has been food and/or blog-related, not like the plethora of photos of people, places, and my viewpoints of life as I’d done six months before. Now I realize I haven’t lost my artistic talents, but they have evolved into a specific focus as opposed to having many fingers in many cooking pots. Cookery is the art form that allows me to share my work with others in a way I’ve never been able to do with my other artistic talents.


To strengthen your Creative Mind in regards to cooking, I recommend looking for inspiration everywhere you can, whether it be from cookbooks, television shows, blogs, family members, and friends. I have a tendency to stray away from recipes, particularly because my Creative Mind likes to think it came up with the idea on its own (but I do give credit where it is due, and will always link to the original recipe or site my source).

When you have an idea, whether it be directed to a certain ingredient, cuisine, or food type, picture it in your Mind’s Eye using all the senses. Imagine what it will Look like, from start to finish. Visualize the Sounds that will come from making the dish. Envision the Smells wafting from the product. Think of how it [utensils, bakeware, and ingredients] would Feel in your hands, then in your mouth, as you Taste it. I like to balance meals, but at the same time use ingredients that many wouldn’t think of as compatible. When I’m unsure, I have a tendency to smell ingredients side by side, or taste the combination of flavors when I can. If it doesn’t smell or taste “right” to you and your Creative Mind, it may not turn out the way you’re expecting. One thing I stress, however, is that looks can be deceiving so try not to solely base a recipe on sight alone.

(source)

Sometimes, the best way you can enhance your Creative Mind is by taking a classic and putting your own twist to make it unique. To quote one of my favorite gastro-adventurers of all time, Bizarre Foods’ Andrew Zimmern, “If it looks good, eat it.” But I say unto you, “If you can think it, make it.”

The only person keeping you from making a fabulous meal is yourself.


 Philly Cheesesteak Stuffed Green Peppers

3 Green bell peppers, halved vertically
1 Medium white onion, halved vertically and sliced into thin shreds
3 Garlic cloves, finely diced
12 – 16 oz Shaved beefsteak, coarsely chopped into manageable, bite-sized pieces
10 shakes (1/2 tsp.) Red chili pepper flakes
1 tsp Salt
3 slices of Fontina cheese, cut into 6 pieces
3 thick slices Large tomato, cut into crescents

Preheat the oven to 350°F.
In a large steaming pot (or skillet filled up to an inch of water), steam the peppers on high heat until soft.
In a large greased skillet, cook the onions, garlic, salt, and pepper flakes until the onions are translucent and soft on medium heat.
Add the shaved beefsteak and stir until the steak is fully cooked and the ingredients thoroughly mixed.
On a greased baking sheet (or lined with parchment or aluminum), place the peppers facing up.
Using tongs, put the beefsteak-onion filling into the peppers.
Lay the cheese slices on top, and the tomato crescents on top of the cheese.
Sprinkle salt and pepper as garnish, and put them into the oven for 15 minutes. (You can also broil to slightly brown the tops for three minutes after the 15 minutes are up.)
Top with sour cream and serve with a side of rice.

Makes 6 stuffed pepper halves. Serves 3 as a main course, and 6 as a starter.